Announcement

Collapse
No announcement yet.

Project "Apache Resistance".

Collapse
X
 
  • Filter
  • Time
  • Show
Clear All
new posts

  • #61
    Another update on my on board air progress. Got 20' of 3/8 air hose today.

    The build thread i was reading called for 300PSI tube. I ended up with 1,125PSI hose. I guess you could say mine is a little bit stronger than his is going to be.

    I also got an air filter and a pressure gauge that goes up to 160PSI. I plan on running my system at around 140-150PSI. Should of got a gauge that went to 200PSI, but whatever.

    Also got (2) 3/8" Apollo ball valves. Going to put a dirt leg on the piping to get rid of all of the condensation in the system. This wasn't called for in the thread, but it's what you do when you pipe an air system into a shop. Figured i might as well do it.

    It appears that most sanden compressors have 1/2" NPT threads coming out the back. Mine doesn't. Instead, I'm going to cut them square where the red lines go across, and weld on a 3/8" nipple to each side. This way i will have something to thread into, and i don't have to "slide the air hose over the metal and hose clamp it on". I just think it'll be stronger.

    As for keeping this thing lubricated, i began to read up on it, and it's like i've opened a can of worms. Nobody can decide if greasing it or oiling it is better, and no one really explains how either are done.

    I think i put an inline oiler in the front, and just keep filling it with A/C oil as it calls for it. I then realized that on the bottom of my air filter there was a self bleeder. Maybe i'm suppose to put a hose coming off that and feed it back into the inline oiler? I don't know. Time will tell.

    The other thing i don't know is where do i wire the pressure switch to? Do i wire that to the compressor to tell it to kick off or what? I have no clue how to wire any of this up. Need to find a thread on that soon.

    I'll keep you all updated with pictures.


    Hudson

    Build Thread - http://www.ausjeepoffroad.com/forum/...d.php?t=121903

    No Amount Of Money Is Worth Your Sanity.

    Comment


    • #62
      Today i worked on the transfer case linkage, and the on board air piping.

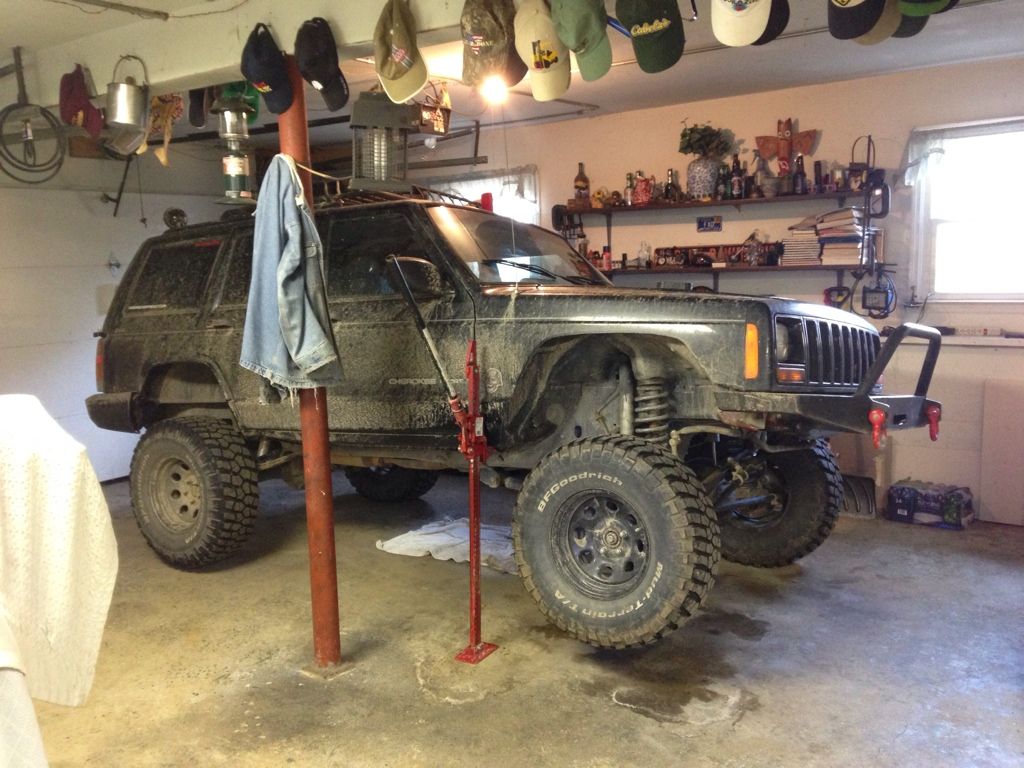
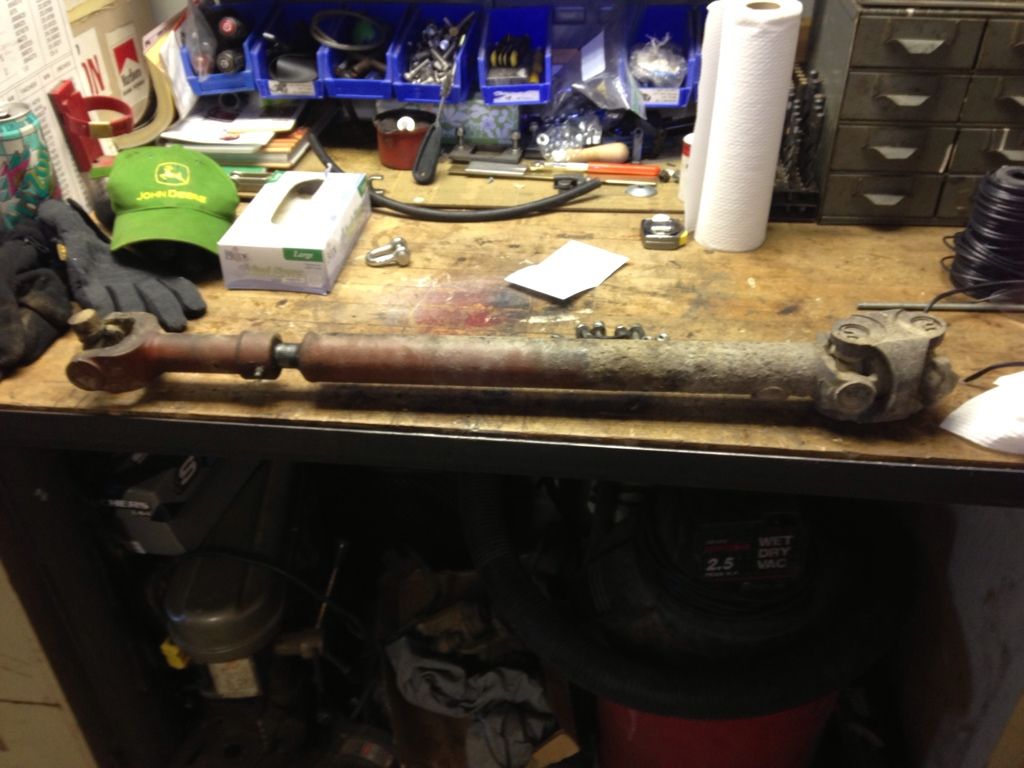
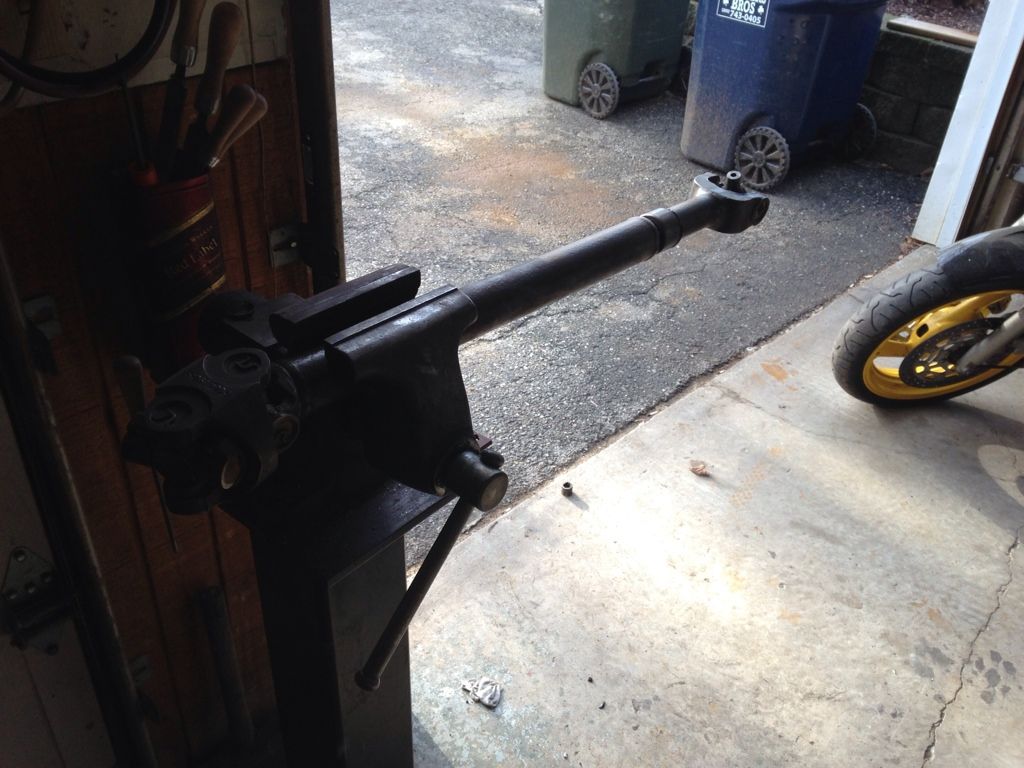
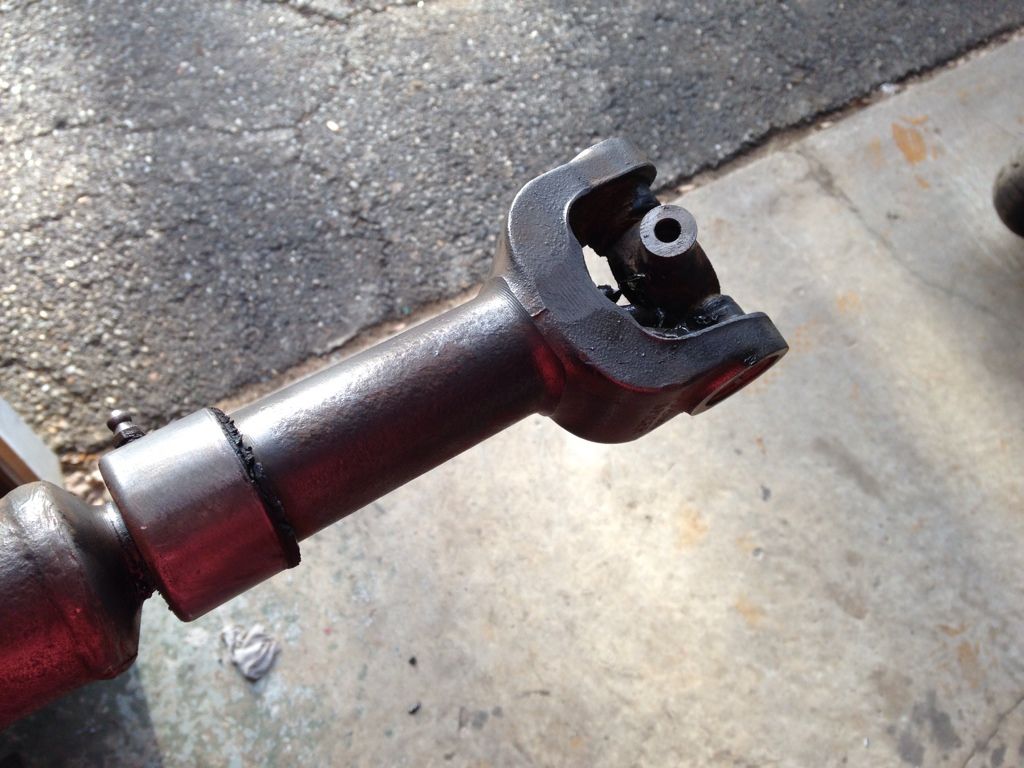
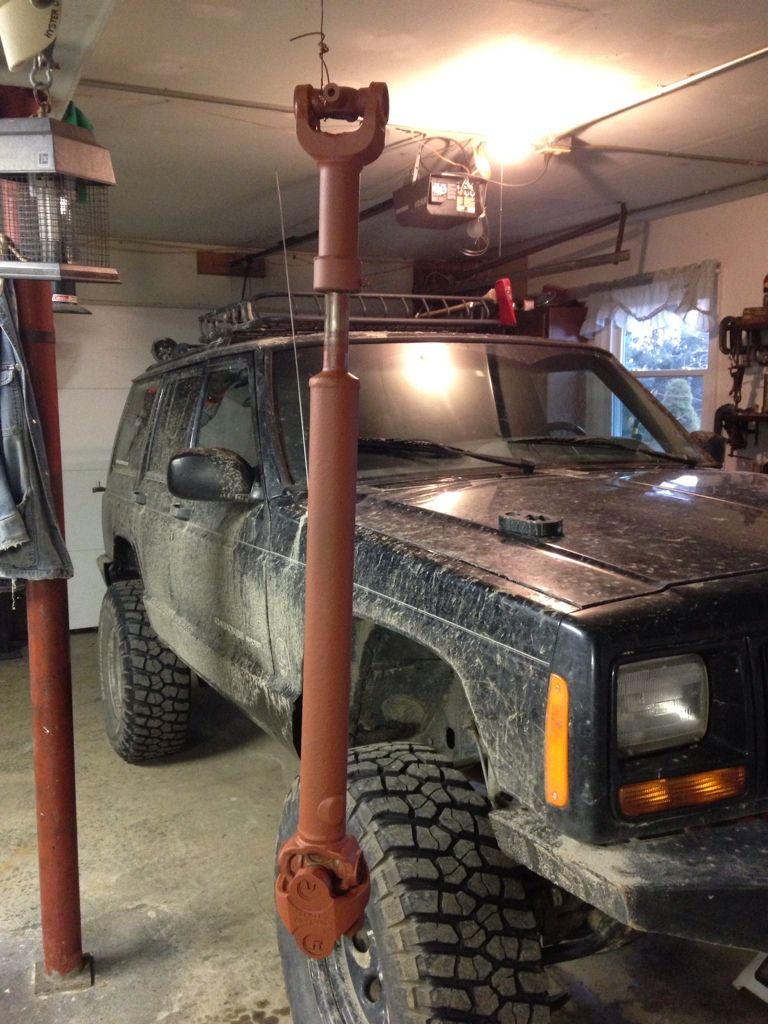
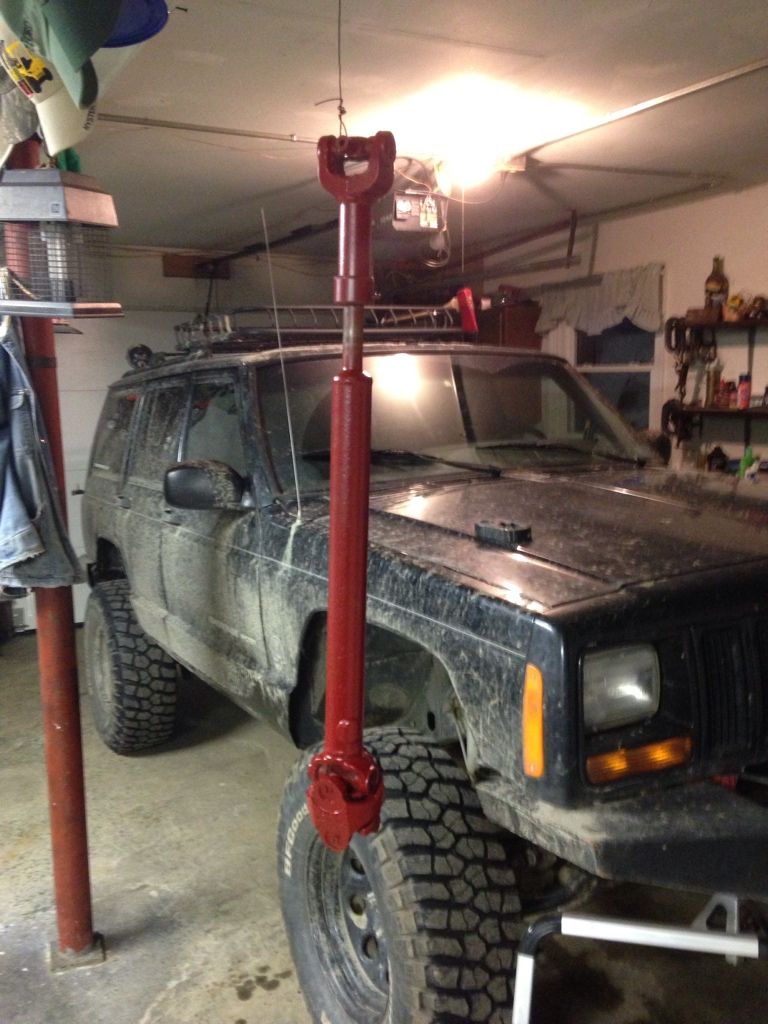
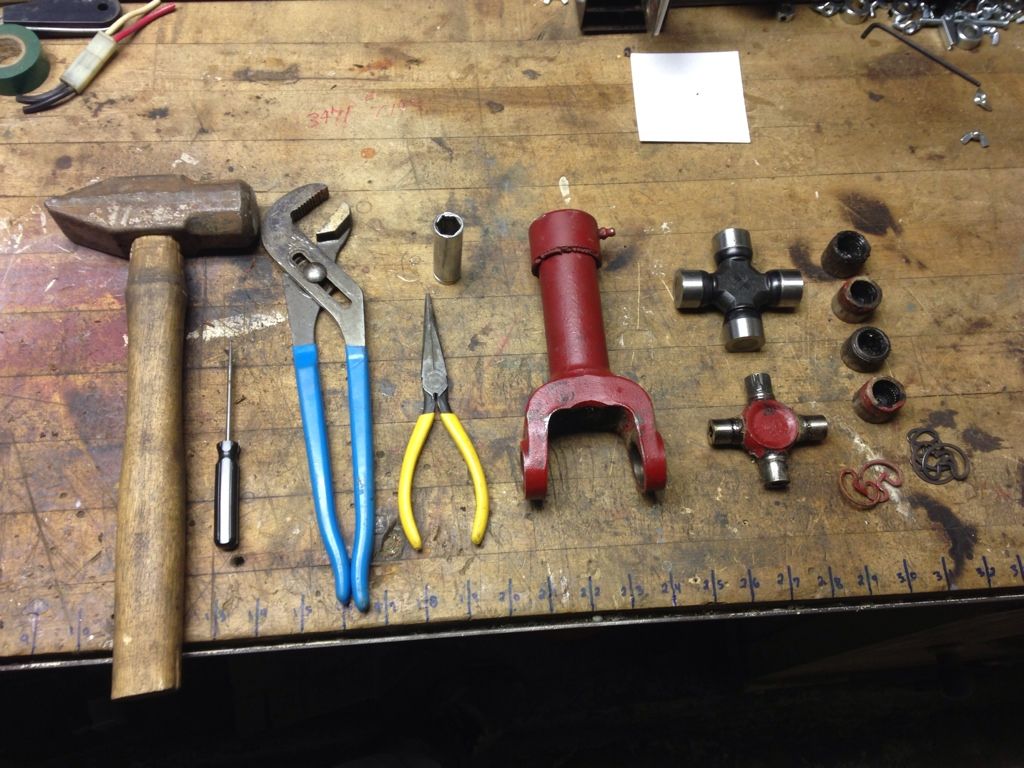
      Took the front driveshaft out, and then realized i didn't have a 3/8 heim joint to connect the lever to the T-Case so i had to stop there. The front driveshaft was covered in caked on dirt, and quite rusty, so i re-did it. I wire-wheeled it down, primed it up, and painted it red. I think it looks way better. This was followed up by me regreasing the entire thing.

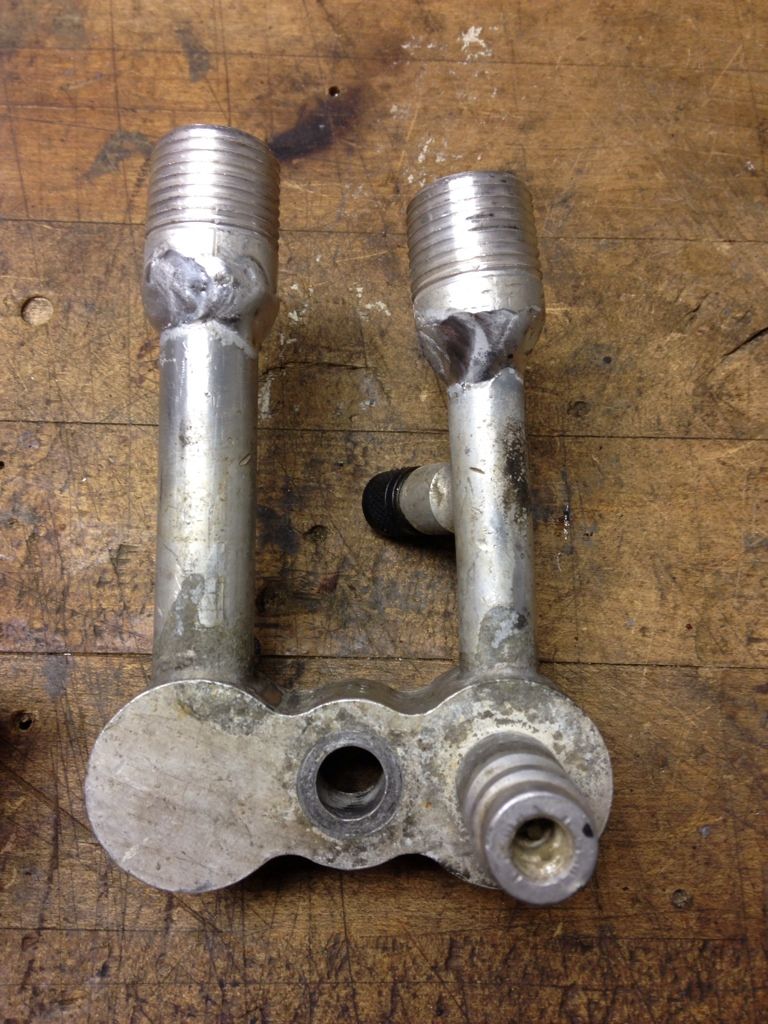
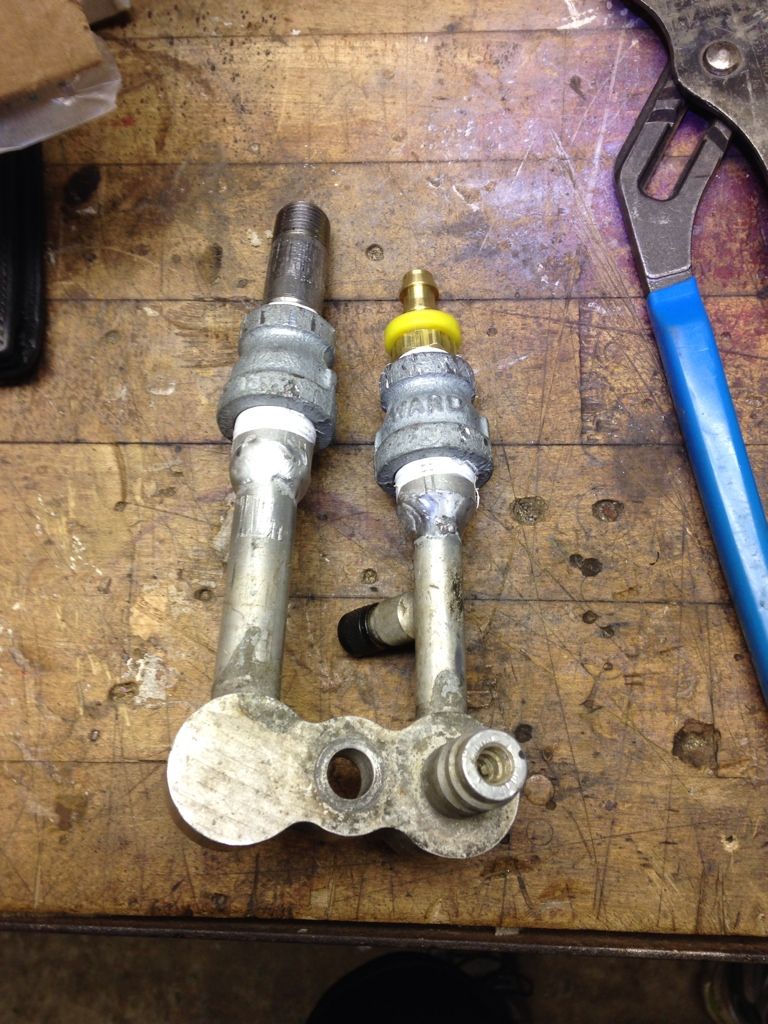
      Got around to welding a 1/2" nipple onto my aluminum a/c thing. Aluminum is a royal PITA to weld, but i finally managed to do it. Pictures show what i did. I know welding this one wasn't necessary, but i think it looks better and will hold up better in the long run.

      I put a coupling and a nipple on one side (this is the side that sucks air in) and a coupling and a 3/8" barbed x 3/8" NPC thread into the bushing. Going to run my air line across the jeep to the right of the air filter to get some room to work on it. It should look really nice when i'm done.

      Feel free to ask any questions.


      Last edited by Hudson; 01-27-2013, 10:59 PM.
      Hudson

      Build Thread - http://www.ausjeepoffroad.com/forum/...d.php?t=121903

      No Amount Of Money Is Worth Your Sanity.

      Comment


      • #63
        Really dont think that weld on the aluminum is gonna hold. Still using my york?


        Edit: not knocking you. Just saying i dont think MIG will hold at pressure....everybody ive read has used hose clamps...unless you have access to a TIG
        Last edited by hippie metal; 02-17-2013, 04:32 AM.
        Originally posted by HitItWithSomeSpeed
        didnt this thread start with Jon being gay? what happened to that?
        Originally posted by Lawn Guyland
        he's still gay we've just moved on to more important issues
        Originally posted by Zullius Caesar
        i grab dude's junk all the time, doesn't make me gay.

        Comment


        • #64
          Originally posted by hippie metal View Post
          Really dont think that weld on the aluminum is gonna hold. Still using my york?


          Edit: not knocking you. Just saying i dont think MIG will hold at pressure....everybody ive read has used hose clamps...unless you have access to a TIG
          We'll find out. If that weld breaks i'll give it to my dad and have him bring it to work. They have TIG welders there along with dudes that weld all day long. Could probably do a hell of a lot better than i can.

          No, i am not. Figured out i need to relocate my battery and either use a V-belt off the alternator to power the york, or build a custom bracket off my current sanden A/C and get a longer serp belt to run it.

          Imagine if i put a york in the jeep and also kept the sanden and piped them together for dual air? Haha. Would be ridiculous.

          I can give your york back whenever. If you need it back ASAP i can have it there tomorrow if you're around. Once again, thanks for that.
          Hudson

          Build Thread - http://www.ausjeepoffroad.com/forum/...d.php?t=121903

          No Amount Of Money Is Worth Your Sanity.

          Comment


          • #65
            Been updating this build on another website, and forgot to update this one at all.

            Bare with me as i post about two pages of information.

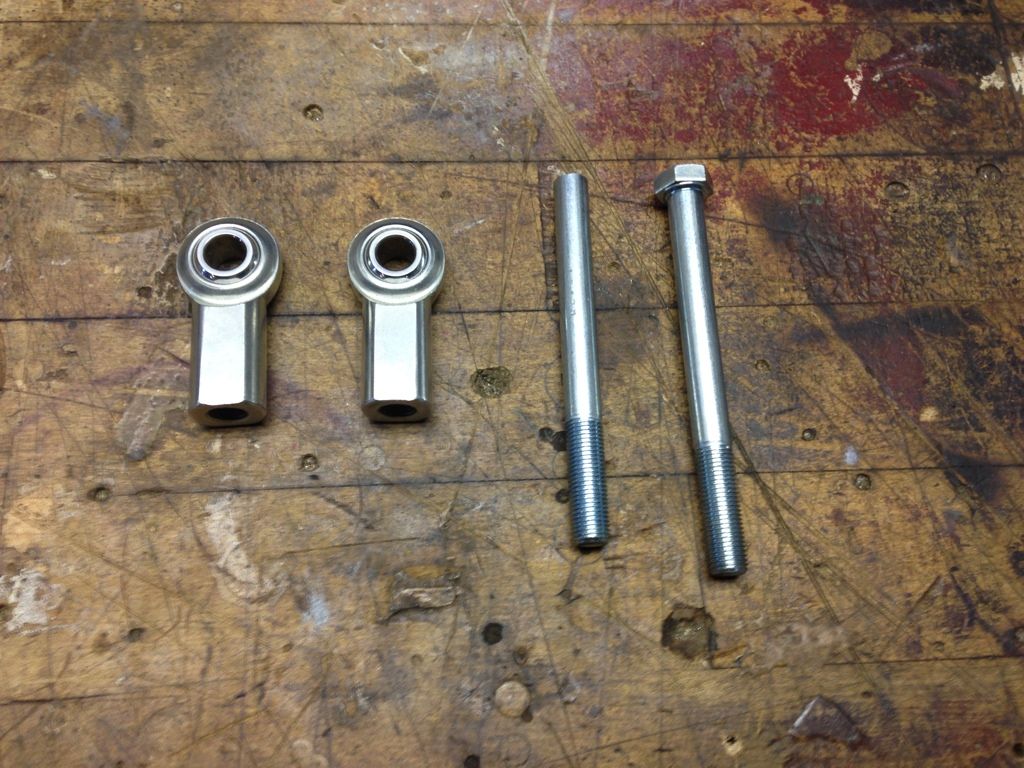
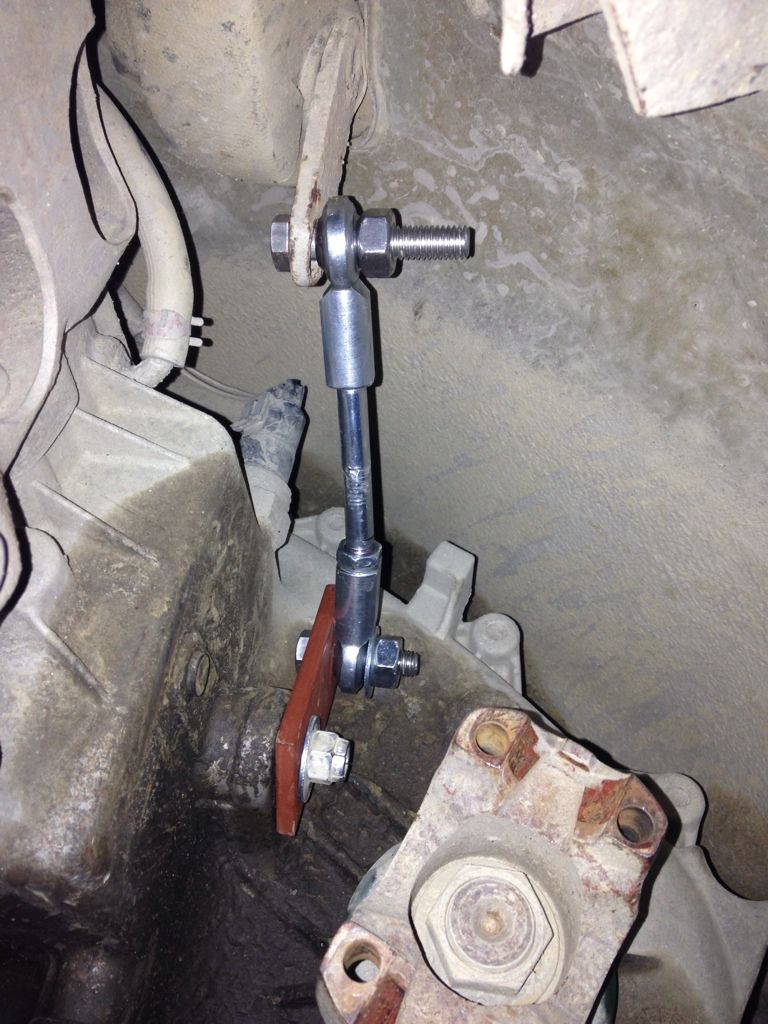
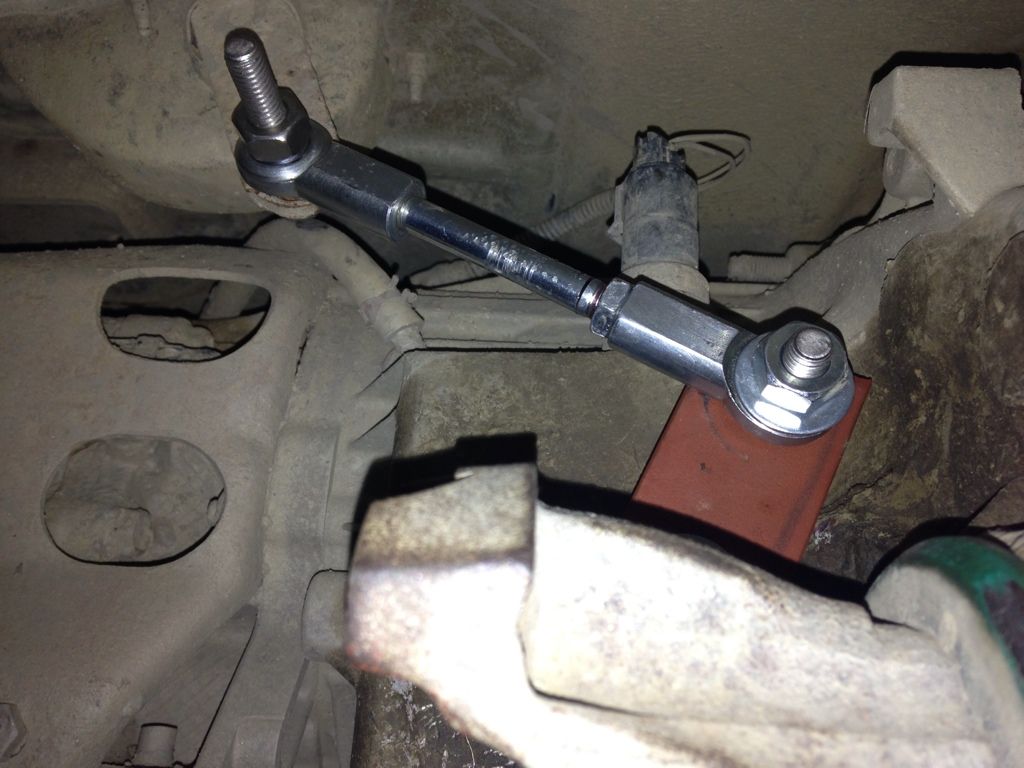
            Well my two 3/8" heim joints came in today. I thought it was going to be this simple process of putting it together, but nope, that's never the case.

            For some reason, the heims were fine thread, and i only have 3/8" course threaded rod and bolts. Would of been super simple to correct, but my welder ran out of shielding gas so it's currently out of commission.

            I went to my local hardware store and bought (4) 3/8-24 bolts. (4 inches long). These thread into the heims perfectly.

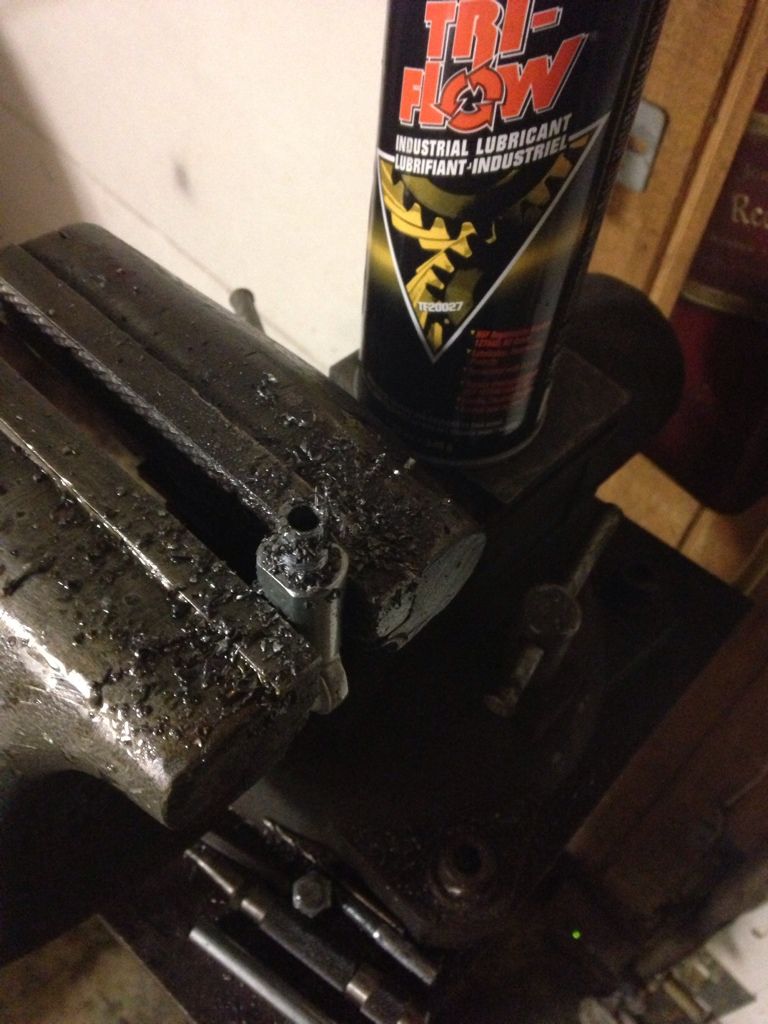
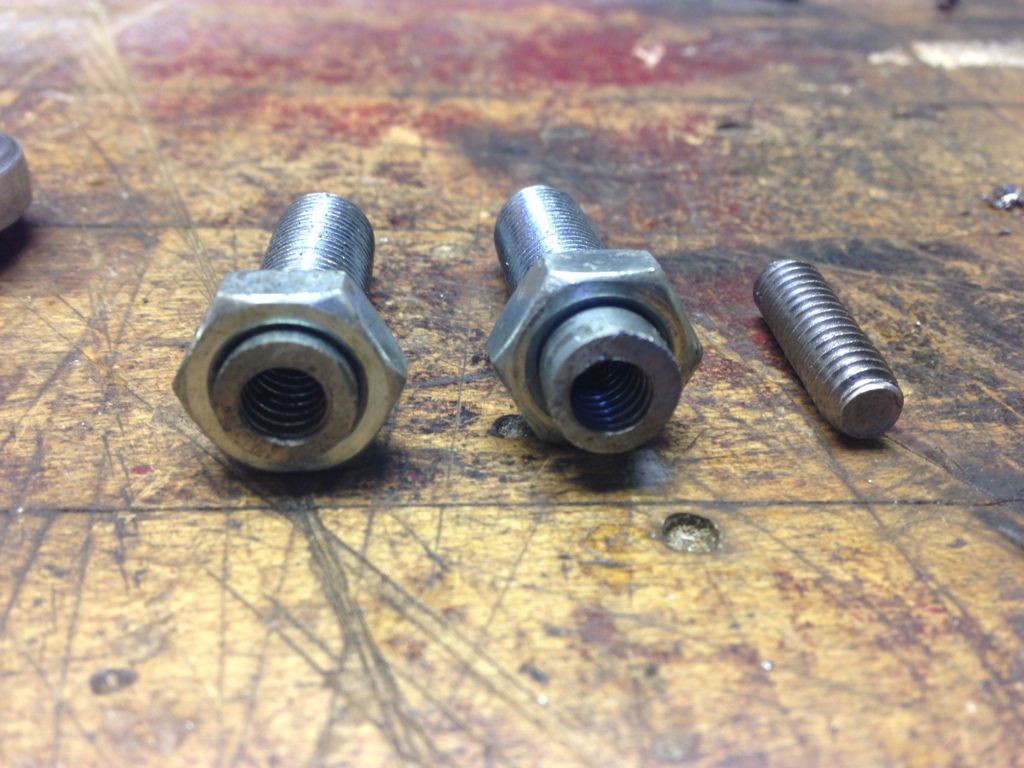
            Started thinking of other ways to connect the two and it hit me. I cut the head off of one of the bolts, filed it down so it was flush all the way across, grabbed my cordless drill and drilled a hole through the shaft of the bolt. I then taped the inside shaft with a quarter twenty tapping, and repeated the process on the other bolt.

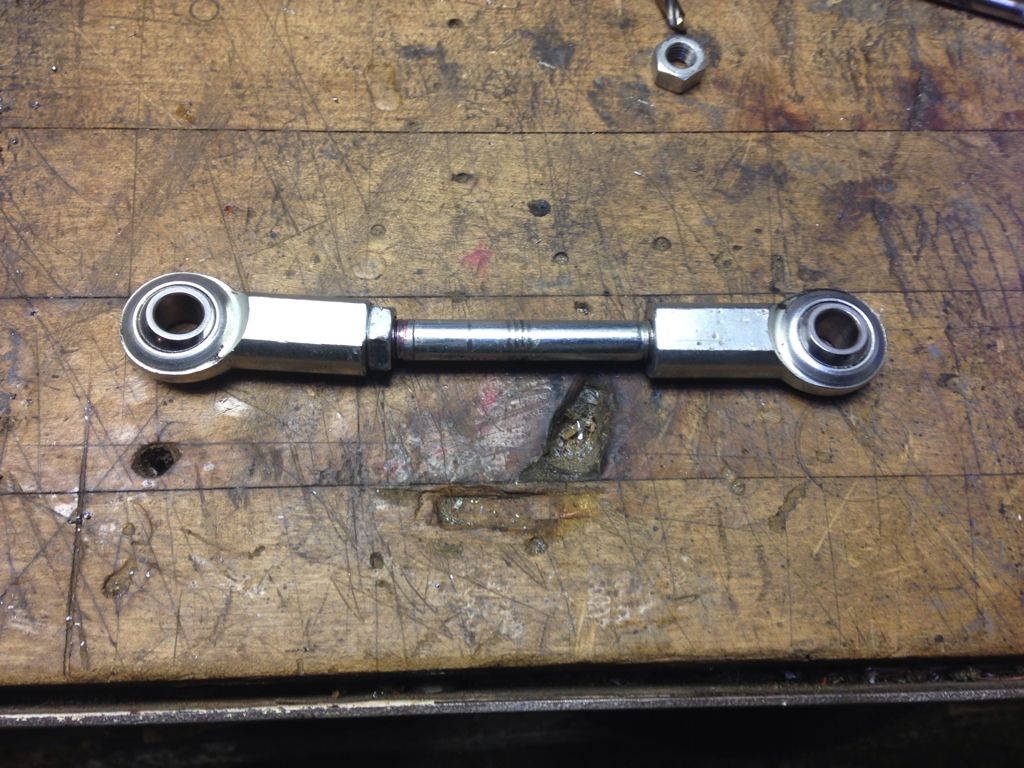
            I grabbed a quarter twenty bolt, cut the head off, and kept just the threads. I then threaded this half way into my 3/8" bolt, and half into the other one and loctited it in place. Threaded the threads on the bolts into the heim, and we were in business.

            Just took a break to pound down some food, but we're almost there.

            Went back out in the garage after a 20 minute pound down session and put the linkage in and tightened it up. Not sure why, but my linkage only allows the case to shift into 4 part time and 4 full time. No neutral or 4lo. Going to work on getting this sorted out tomorrow as i need 4lo. Looks good though!


            Here are some pictures. You couldn't even tell that the shafts are tapped out and there is a bolt holding them together if i didn't tell. You can see where it splits in the last picture on the left.


            Hudson

            Build Thread - http://www.ausjeepoffroad.com/forum/...d.php?t=121903

            No Amount Of Money Is Worth Your Sanity.

            Comment


            • #66
              Hit a little "bump" in the road.

              Cooling system stopped working correctly. Instead of going all out, i thought maybe i had a leak in the hoses and it was going to be a cheap fix; not the case.

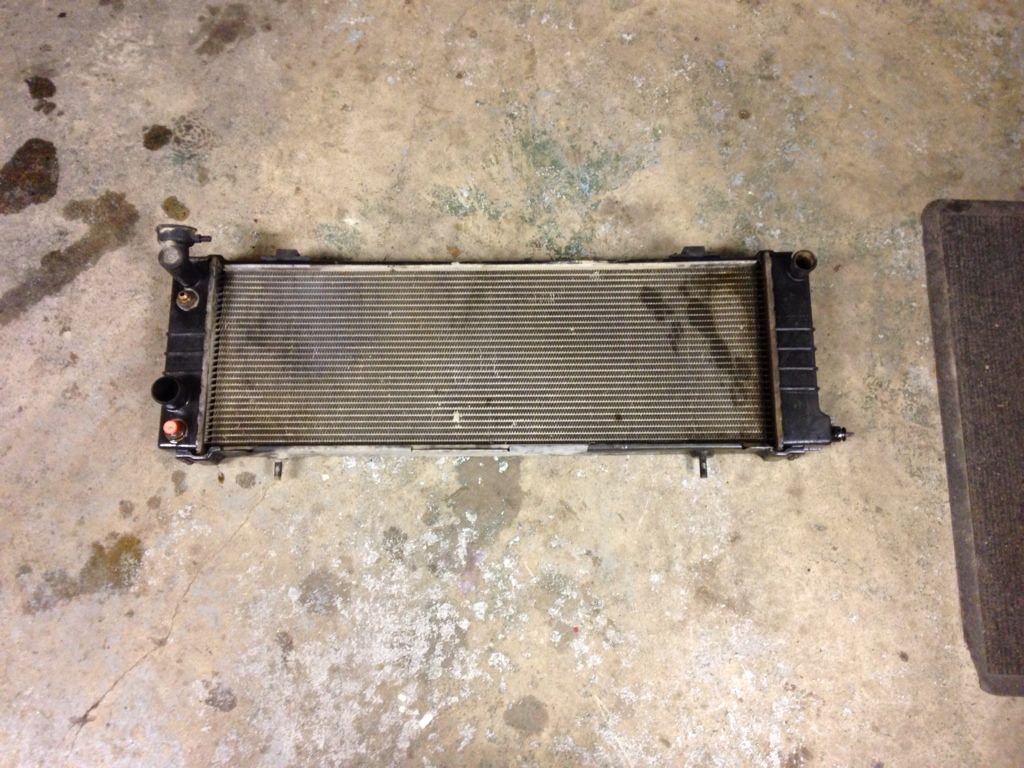
              Bought all new hoses for the cooling system, and installed them. Leaking continued. Defiantly a hole in the radiator.

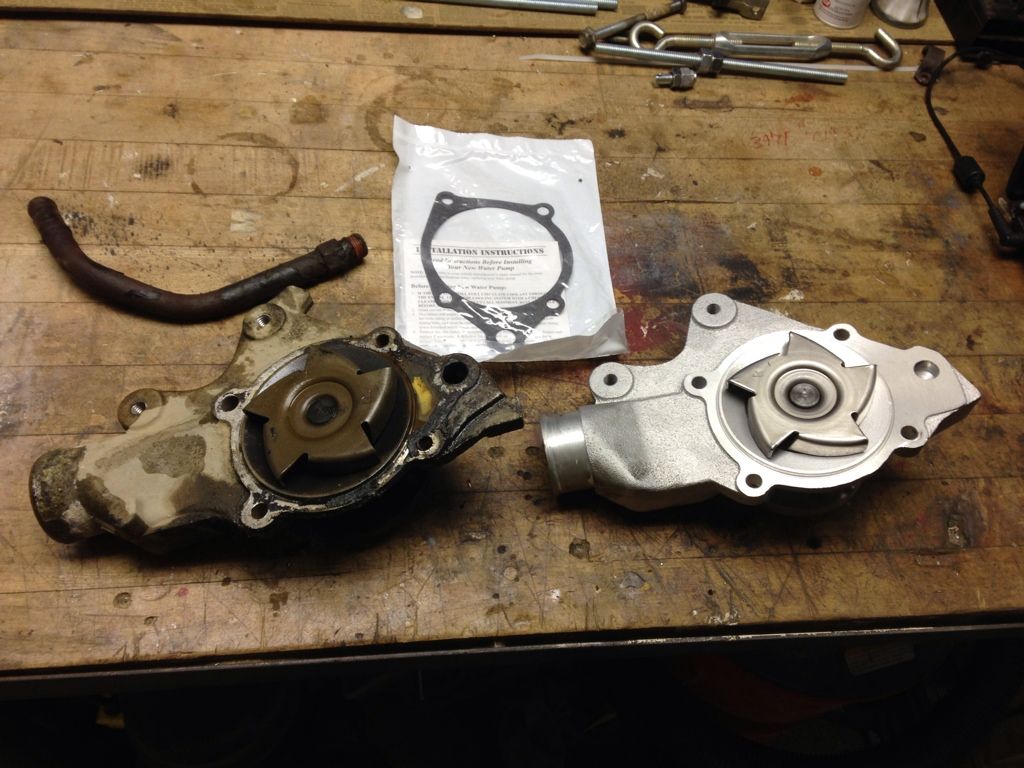
              Just went all out and ordered everything. Figured i might as well put in a new water pump as i think the stock one is still in the Jeep.

              Here is what i ordered. All prices are after the 25% discount i received.

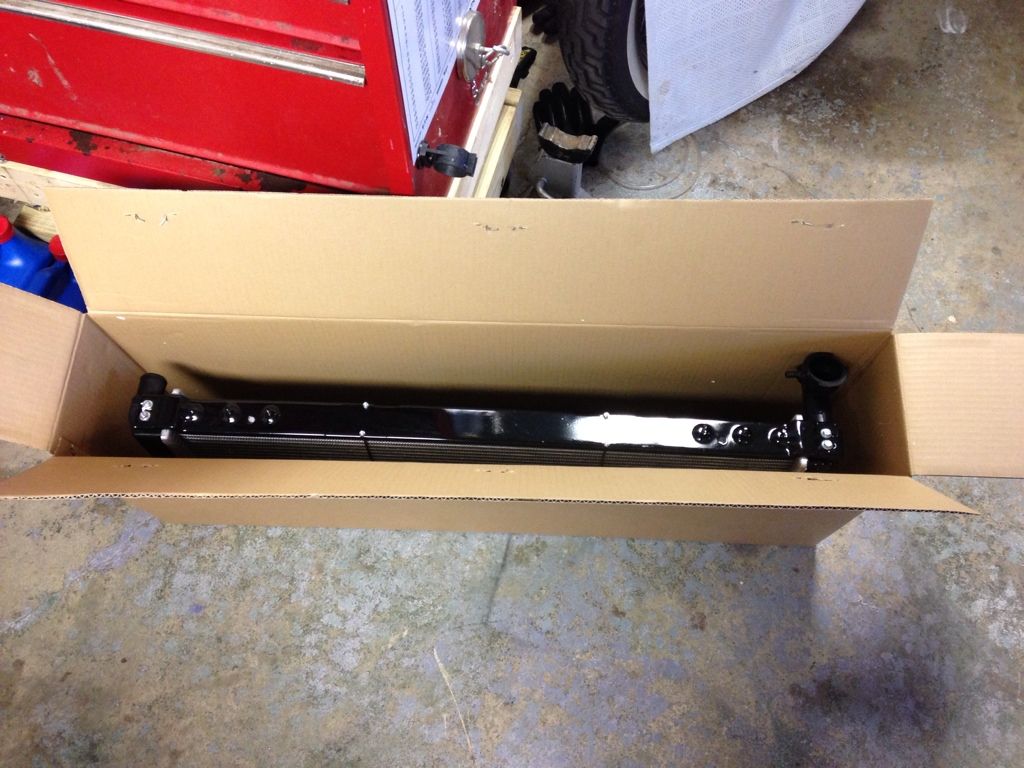
              - New Radiator ($82.49)
              - Radiator Cap (16PSI) ($5.29)
              - Radiator Lower Hose ($10.70)
              - Radiator Upper Hose ($9.29)
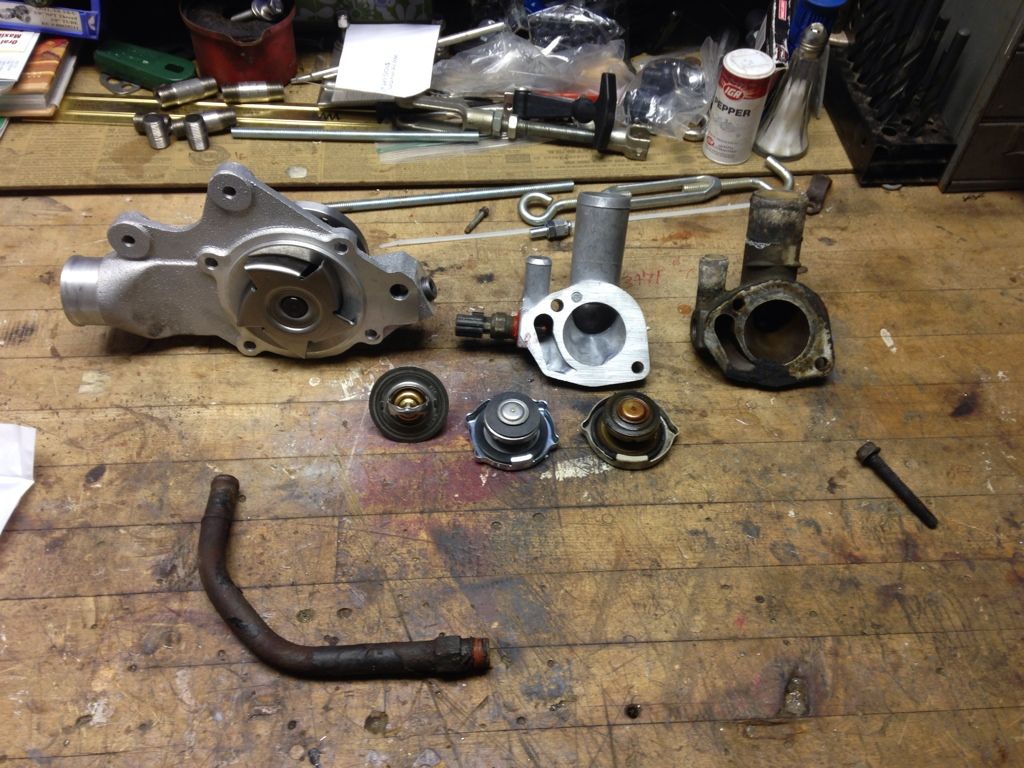
              - New Thermostat (195F) ($7.49)
              - Water Pump ($24.74)
              - Thermostat Housing ($8.24)
              - Water Pump Inlet Tube ($7.25)
              - Water Pump Gasket ($2.29)
              - Thermostat Housing Gasket ($3.19)
              - 2 Gallons Antifreeze ($21.41)

              Total: $182.38 to overhaul my entire cooling system. I'm not going to complain about that.

              Just need to drive down to advance auto and pick it all up. Will post pictures as soon as i get it all.

              Anyways started working on it. I'm in deep. Air tools are so nice to have. They make everything super fast.

              Got all the supports and hoses holding the radiator out of the way and unbolted/disconnected and went to pull the radiator out. Turns out the transmission line has a special quick disconnect fitting on it. Went back to advance auto bought the tool (10$) came home and no bueno. Didn't work. Used a hacksaw to cut the old one off the radiator and just pulled the radiator. Will figure that out later. Used an earplug to put in the transmission line to keep contaminants out of it.

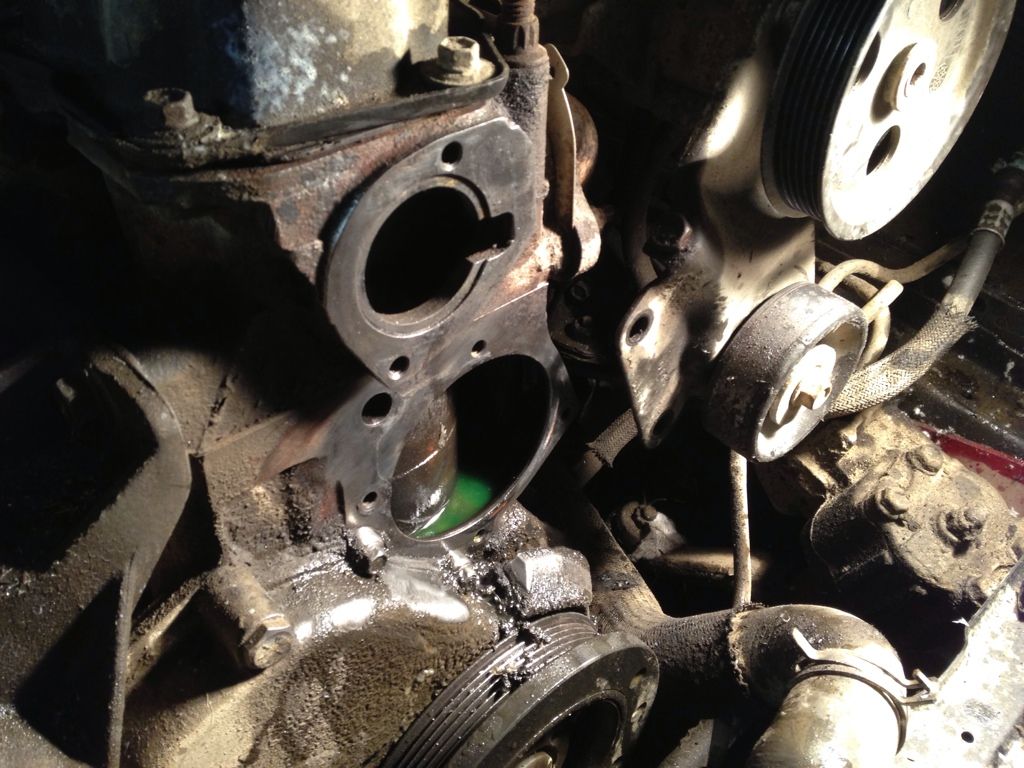
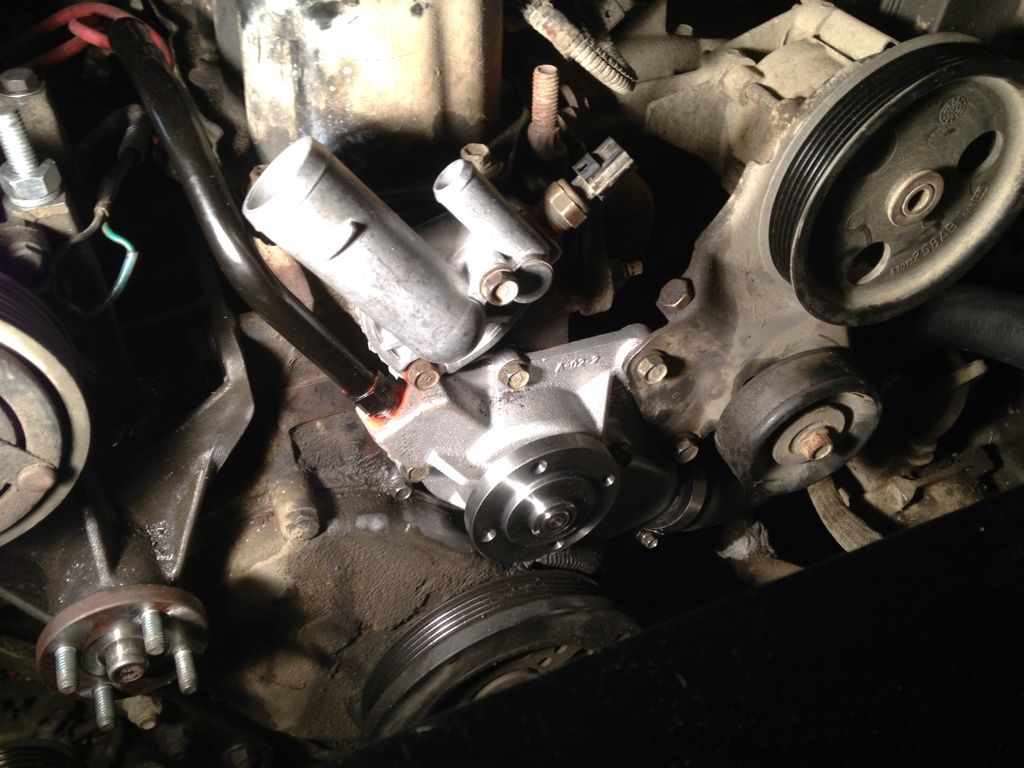
              Got the water pump out and the thermostat and the thermostat housing out. Going to buy a new pickup tube tomorrow for the water pump (forgot to buy one). Cleaned off the mating surface of the water pump and the T-stat housing and all that needs to be done there is put on the new gasket and bolt them up.

              Thought it was going to be harder than it was actually.

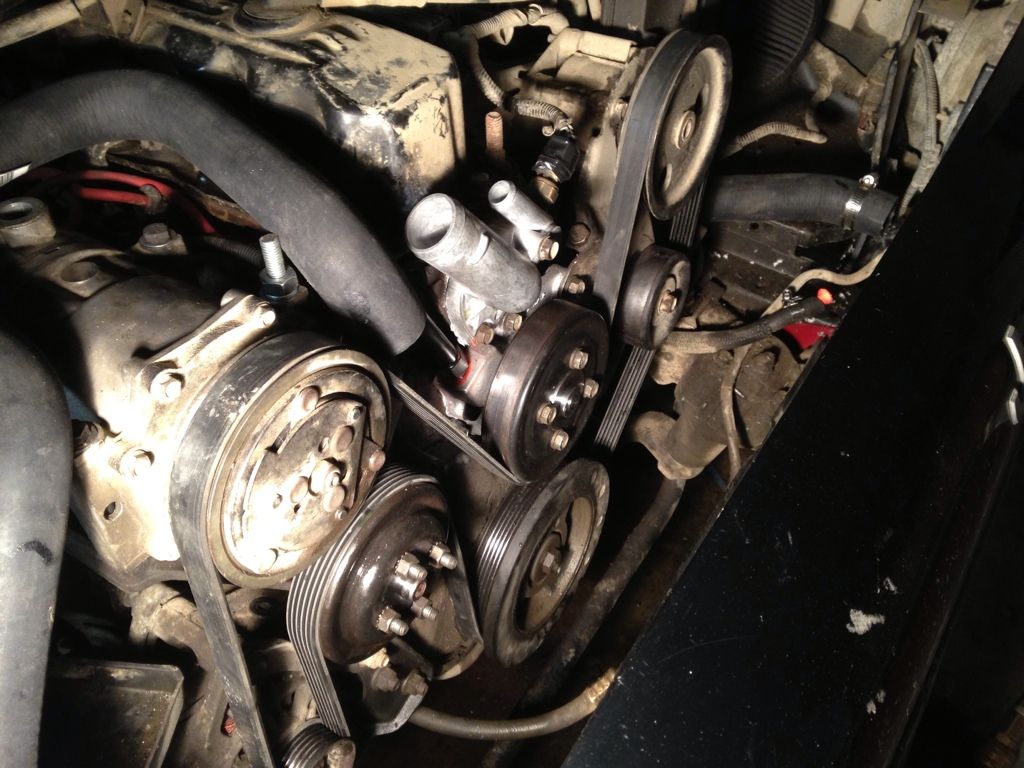
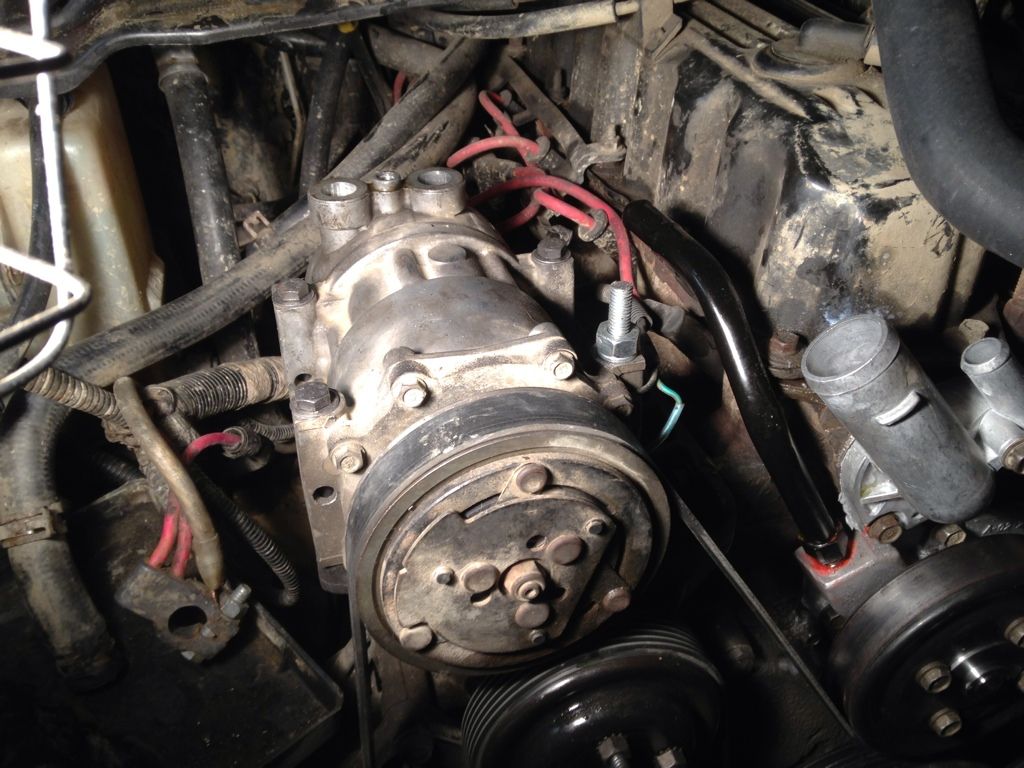
              When i went to pull out my compressor like two weeks ago i snapped off one of the bolts in the bracket. Since i already had the jeep this far apart, i just went ahead and pulled the bracket out as well and am currently in the process of drilling it out so i can put a helicoil in it to accept another bolt.

              Feel free to ask any questions you might have. It's not complicated.

              For 117,000 miles on the original water pump, it honestly doesn't look bad at all. Almost looks new.

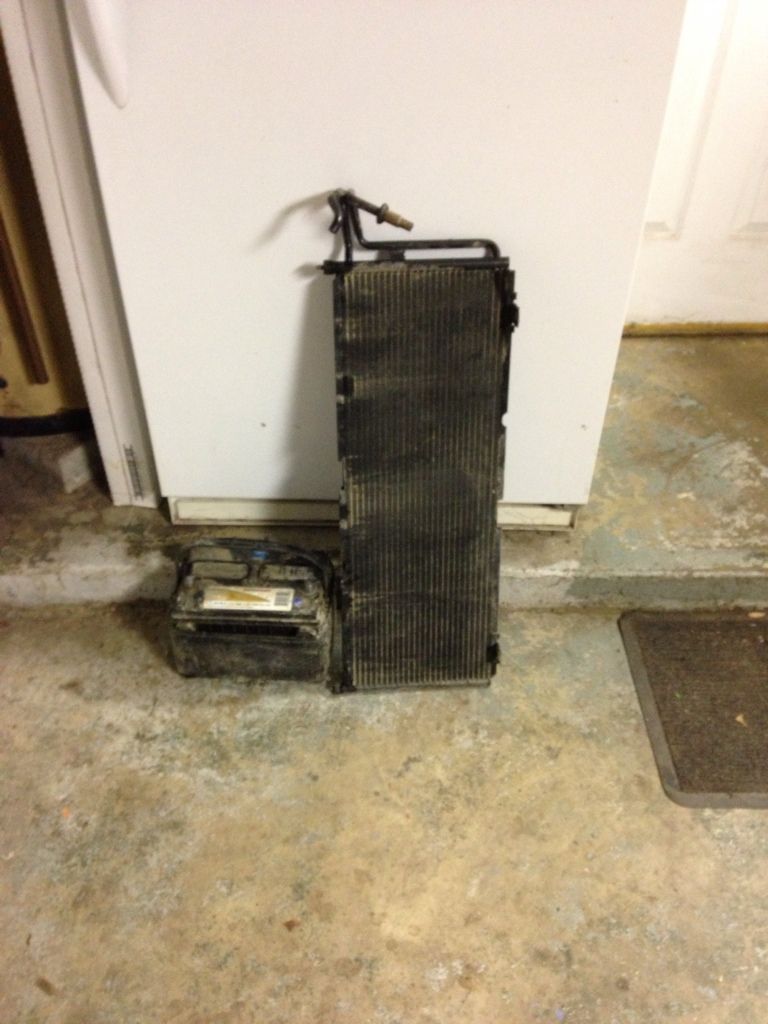
              OH, and since i'm converting the A/C compressor into on board air, i have no need for the condenser. (It's located right in front of the radiator). I just cut that out and pulled it out. I'm not going to put it back in as it's useless for me. Should get more air flow to my radiator, and my Jeep should run slightly cooler.

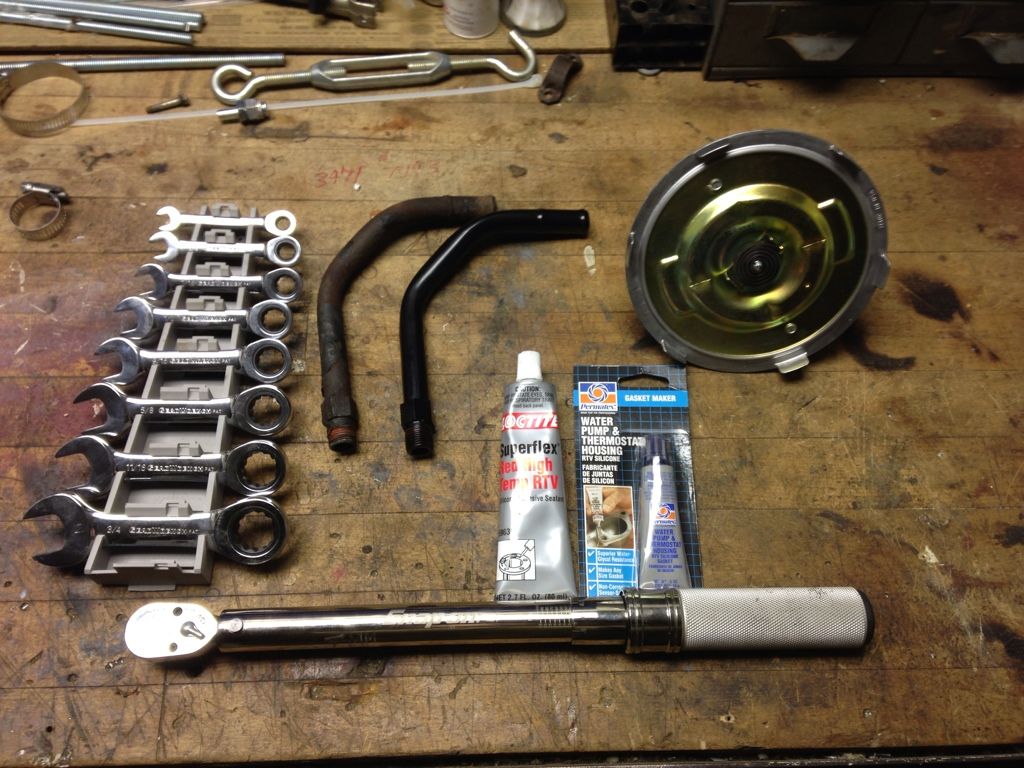
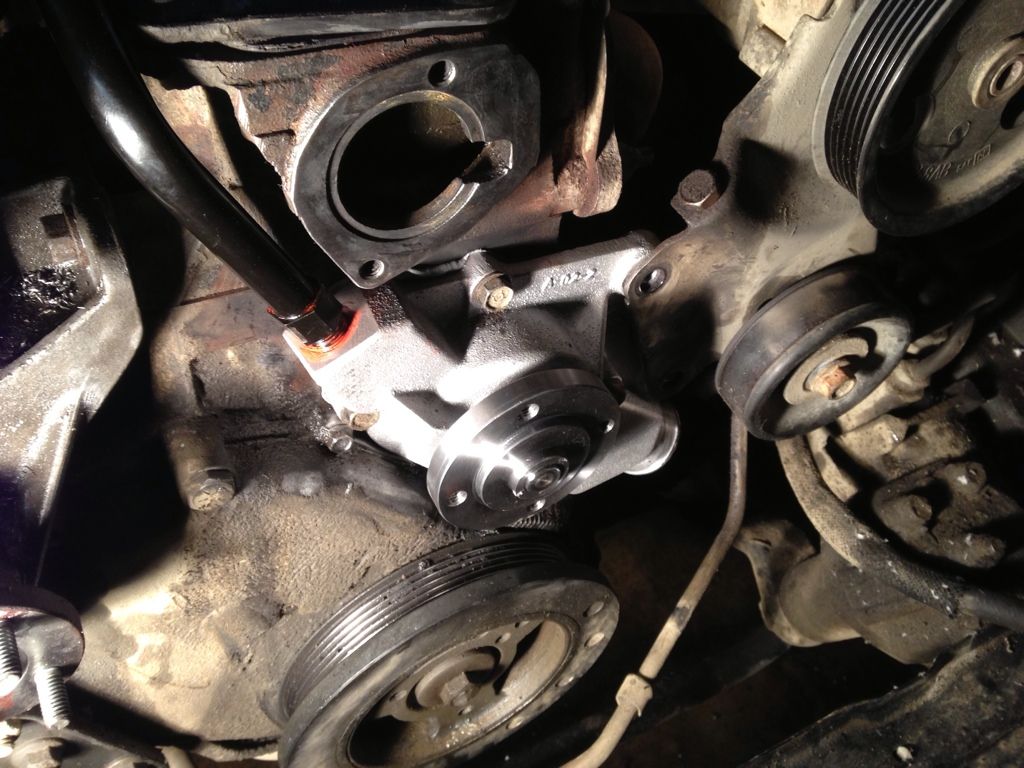
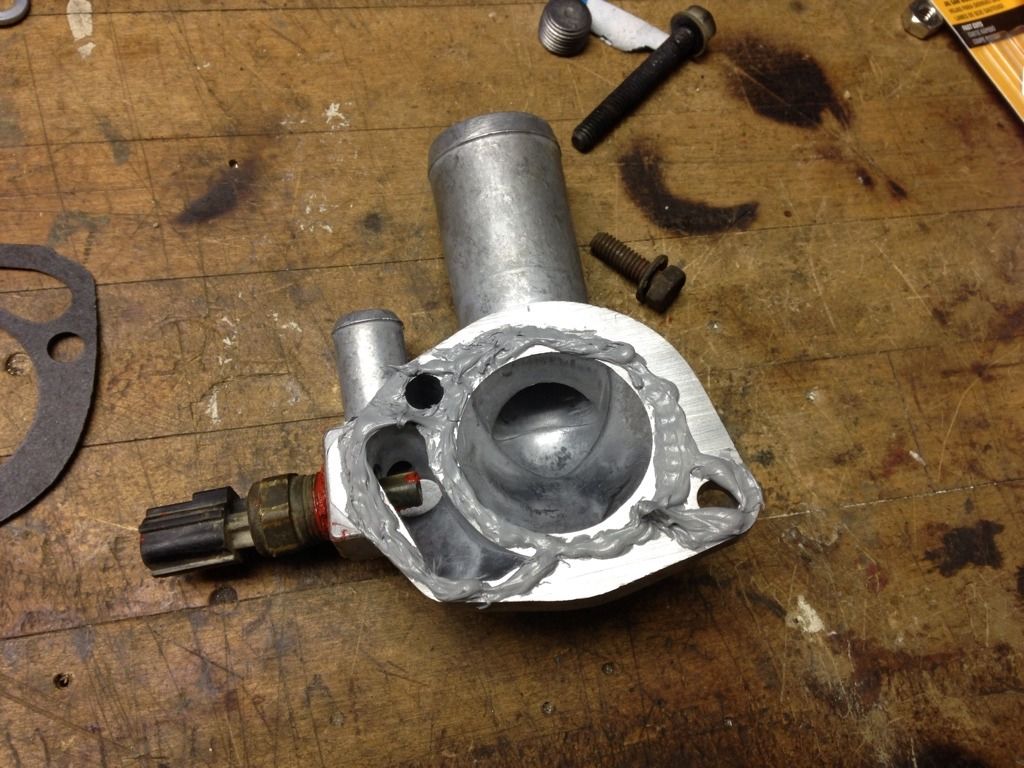
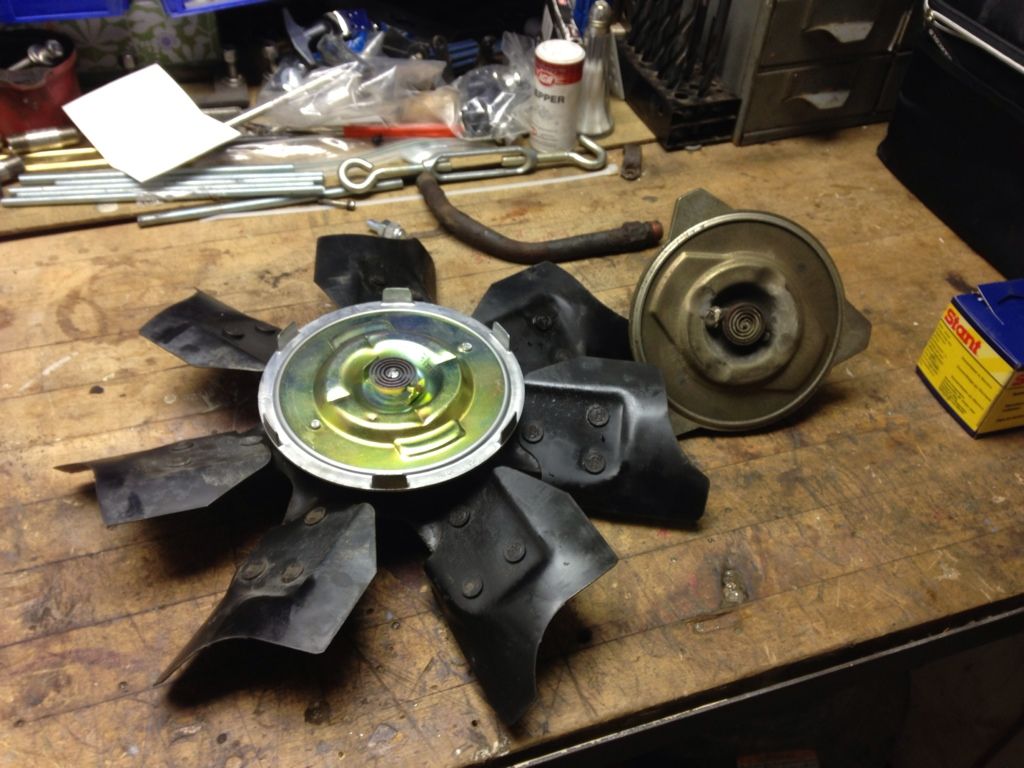
              Here are some pictures;


              Hudson

              Build Thread - http://www.ausjeepoffroad.com/forum/...d.php?t=121903

              No Amount Of Money Is Worth Your Sanity.

              Comment


              • #67
                Sitting here thinking about the jeep and realized i forgot some information.

                Two days ago i ordered upgraded lighting for the Jeep. Most of you probably know that with the stock lighting you'd be better off holding a flashlight out the window when you were driving to see.

                They're terrible. I mean terrible. You can hardly see anything. I just resorted to guessing where the road is and looking at my GPS to see the bends in the road. I got pretty good at it.

                Anyways, i finally got sick of it and went ahead and bought;

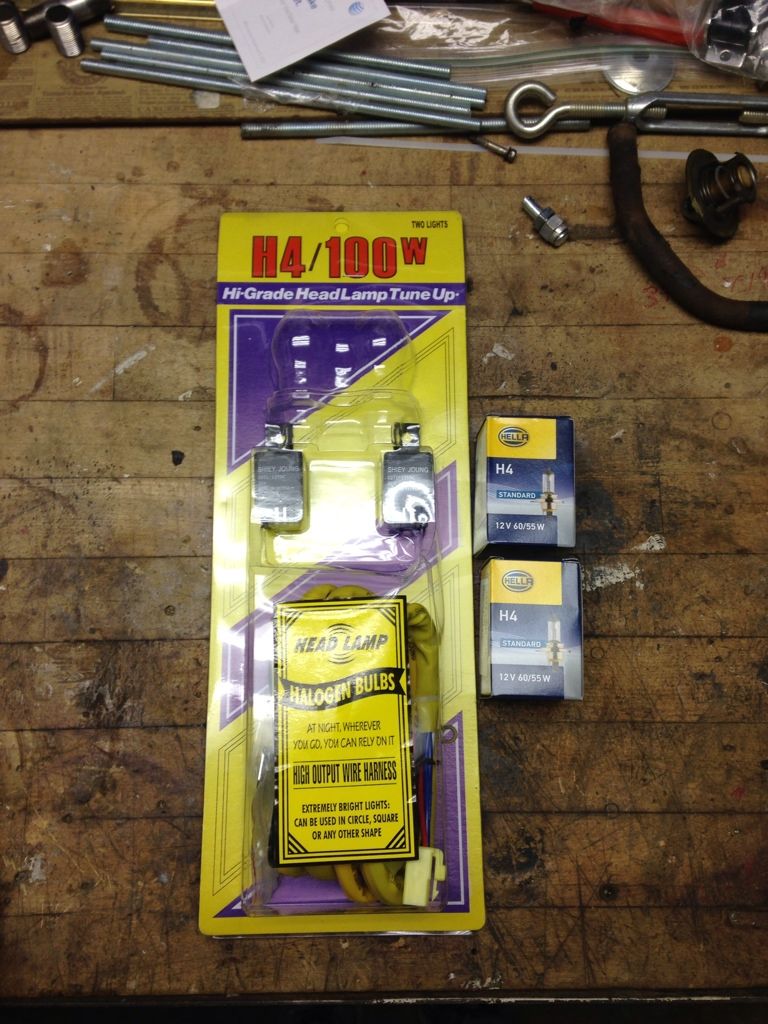
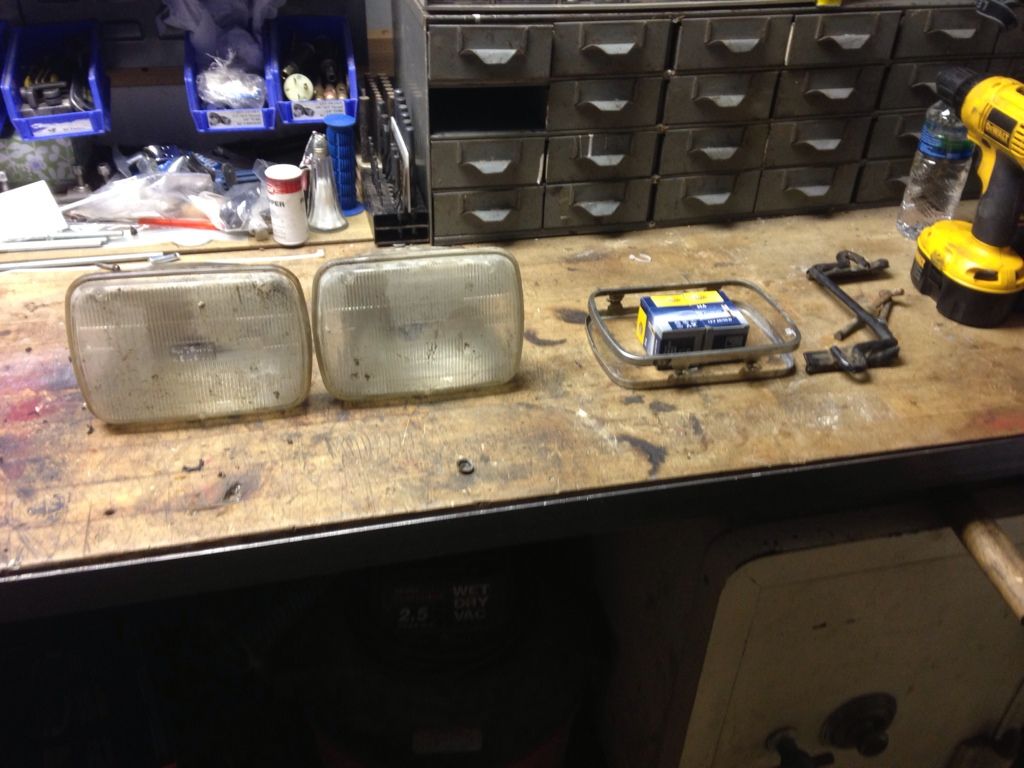
                Autopal H4 Headlight Housing (Comes as a pair.) - $37.95
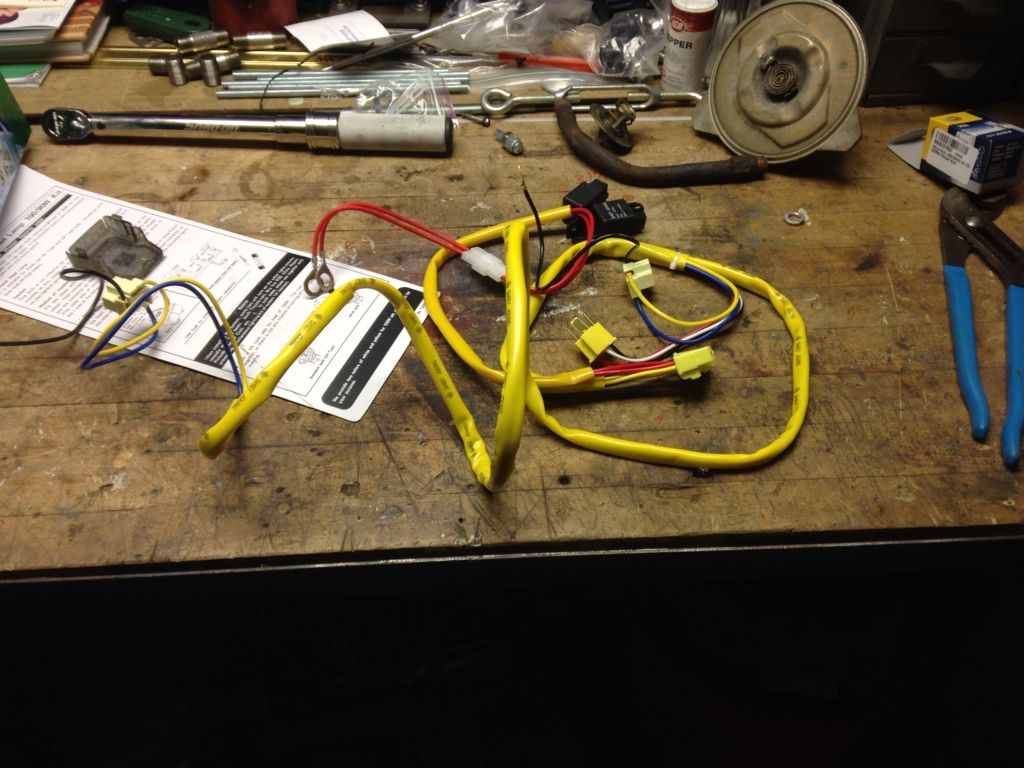
                Putco 100W Heavy Duty Wire Harness - $26.59
                Hella H4 12v 60/55 Watt Halogen Bulb - $8.98 for two

                Total: 73.52. Shipping was free through Amazon prime.

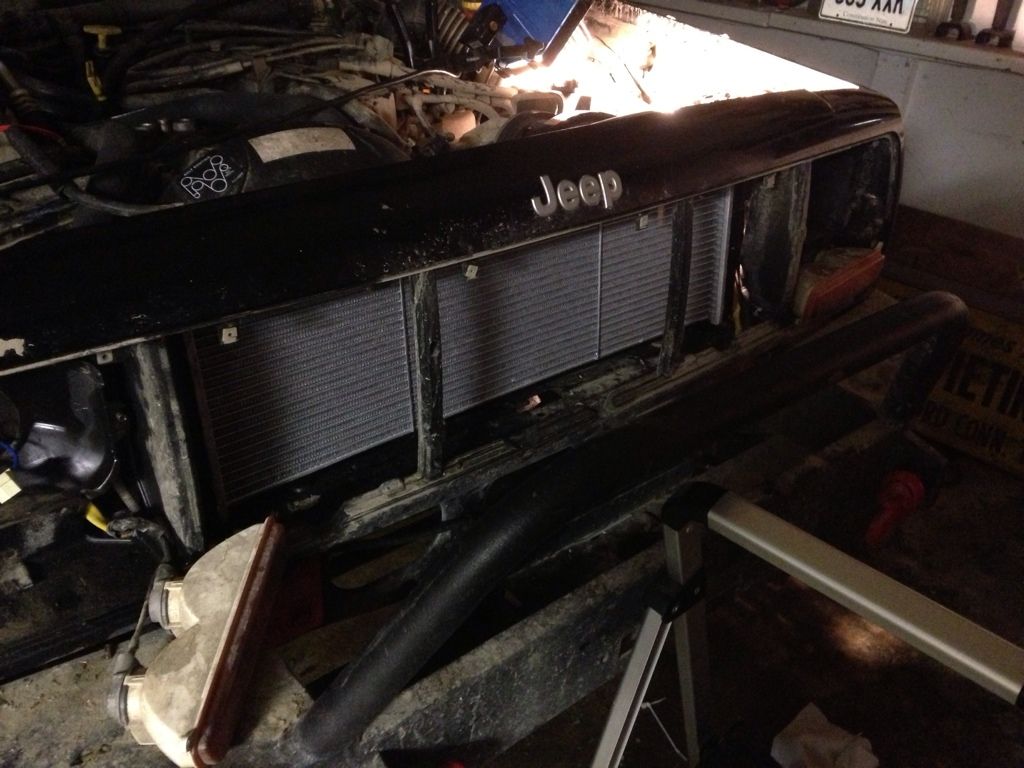
                Figured i might as well wait for this to get to my house before i reinstall the radiator. I have all the room i could possibly imagine in the engine bay. I won't even have to remove the grill. Will make the job a lot easier.

                I'm also going to run my on board air line to the front of the jeep now while the radiator is out. Will make everything easier.

                Will be sure to take pictures along the way in case any of you want to do the headlight upgrade.

                Radiator and water pump and T-stat will probably go back in about 4 days time.

                Got back to working on the jeep today.

                Realized that while i had it all apart i might as well drop another 50$ and just replace everything cooling related.

                Went to NAPA autoparts and bought;

                Fan Clutch: - $42.33
                Water Pump Inlet Tube: - $10.49 (old tube was rusty figured what the hell.)

                Total: $52.82

                Total Spent On Overhauling Entire Cooling System:
                $235.20
                Total Spent On Upgrading Headlights: $73.52
                Combined: $308.72

                I don't think there is any reason to complain. That's on the cheap side in my opinion.

                Put the new fan clutch on my mech fan, and got to work on putting the jeep back together.

                First thing i did was put some RTV sealeant on the inlet tube and tightened it down into the water pump and let it set up for a few minutes.

                Put some RTV sealant on the new water pump and thermostat housing, waited a few minutes, put the new gasket on it, and pushed it onto both of them.

                Put a slight bit of high temp RTV on the bolt threads as well just for kicks.

                Put the water pump back on, made sure everything was lined up, ran the bolts in by hand, then torqued them all to 30 foot pounds.

                Same process with the thermostat housing. Put the new thermostat in, put the housing on, hand tightened the bolts, then torqued them to 30 foot pounds.

                Was going to put the radiator back in, but i figured i'd wait on that. Have new headlights coming in. Would be much easier to run the new harness with the radiator out. I'm also going to be running some 12 gage wire to the front bumper to run some fog lights. Also need to pipe my on board air tube through the front grille. Going to try to get to all of that tomorrow.

                I also got my serpentine belt back on and adjusted correctly. The pulley is bolted back onto the water pump as well and those are torqued to 35 foot pounds.

                All is looking good. Jeeps cooling system should be working perfectly when i do manage to put the radiator back in. Should be all done in about 4 days. (Just waiting for parts to ship in.)

                Almost forgot. Two weeks ago i broke off one of the four bolts holding the A/C compressor onto the bracket. I pulled the bracket off last night, put it in my vice, and drilled right through the bolt that broke off. I drilled straight through the entire mount. I stuck a piece of 3/8" threaded rod up the hole about 7" long, and used that to mount the compressor on. It's actually much stronger than stock. You can see that in the pictures if you look at the A/C compressor.

                Pictures;


                Hudson

                Build Thread - http://www.ausjeepoffroad.com/forum/...d.php?t=121903

                No Amount Of Money Is Worth Your Sanity.

                Comment


                • #68
                  Got in my Putco Wire Harness today and my H4 headlights. The housings should be in tomorrow. I figured while i had the radiator out, it would be a lot easier to install the wire harness.

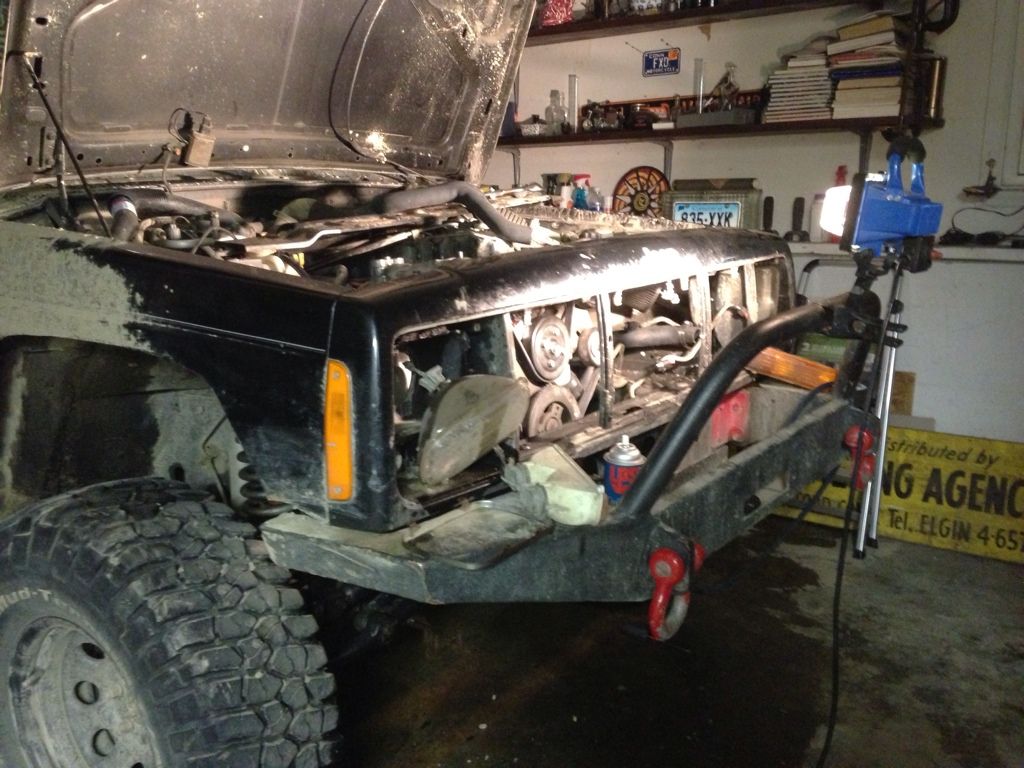
                  Went ahead and popped the front grille off, and took the screws holding the headlights to the jeep out. Headlights fell out, and i took them out completely.

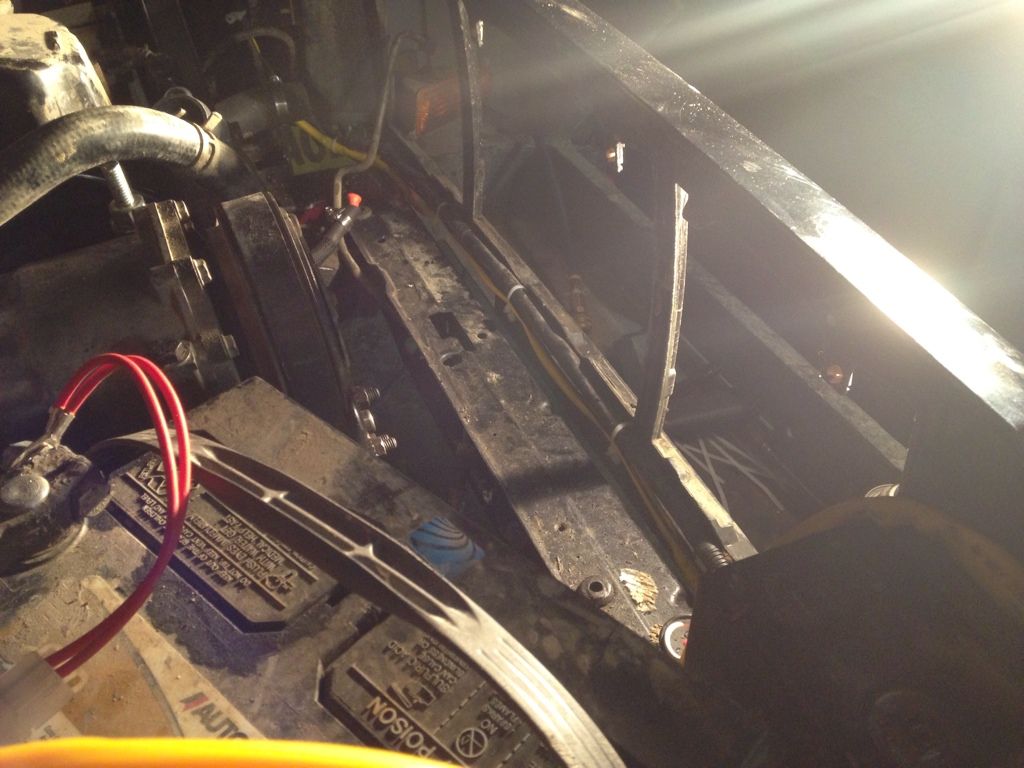
                  Spread the harness apart, ran one side to the driver side, made it look neat, and zip tied the harness going across the front of the jeep to the stock harness. Made it look really neat. Did the same with the passenger side.

                  They recommended grounding the harness to the radiator, but i didn't like this idea. I cut off the connector at the end of both grounds and soldered on a piece of 12 gage wire to each. Ran both back to my batteries negative instead. I like this much better. I hid the relays right next to the battery.

                  To make this easier i attempted to remove the thing the battery sits in. Not so easy. The 3 bolts holding it down all broke off when i went to remove them. Had to get out a drill and drill them out. They now have new hardware holding them down.

                  Took my new radiator out of the box and put that into the jeep. I left the condenser out of the jeep because my jeep has no air conditioning. This allows more air to flow over the radiator - thus cooling the jeep further.

                  Got the radiator in, and the transmission cooler line was being a pain to use the special tool to disconnect it. I cut it off square, and just slide it over the fitting on the radiator and hose clamped it on. That worked perfect.

                  Bolted my new fan clutch to my mech fan, then bolted that onto the pulley. Dropped the electric fan in next. Put all the bolts back in, and i was done. Was actually much easier than i thought it would be.

                  Filled up the radiator with a 55/45 antifreeze/water mix. Started the jeep up and it began screaming like you wouldn't believe. Every slight turn of the steering wheel makes it squeal more. I'd assume it's the power steering pump now.

                  I really don't want to spend the money to replace that, but i think i'm going to have to. Anyways, jeep cooling system is working perfect. Won't even come up to 210 degrees at idle.

                  My new headlight housings should be here tomorrow so i can install that. I can't wait because the stock lights were super dim, and these are suppose to be way better. It's going to be a treat to be able to see things at night.

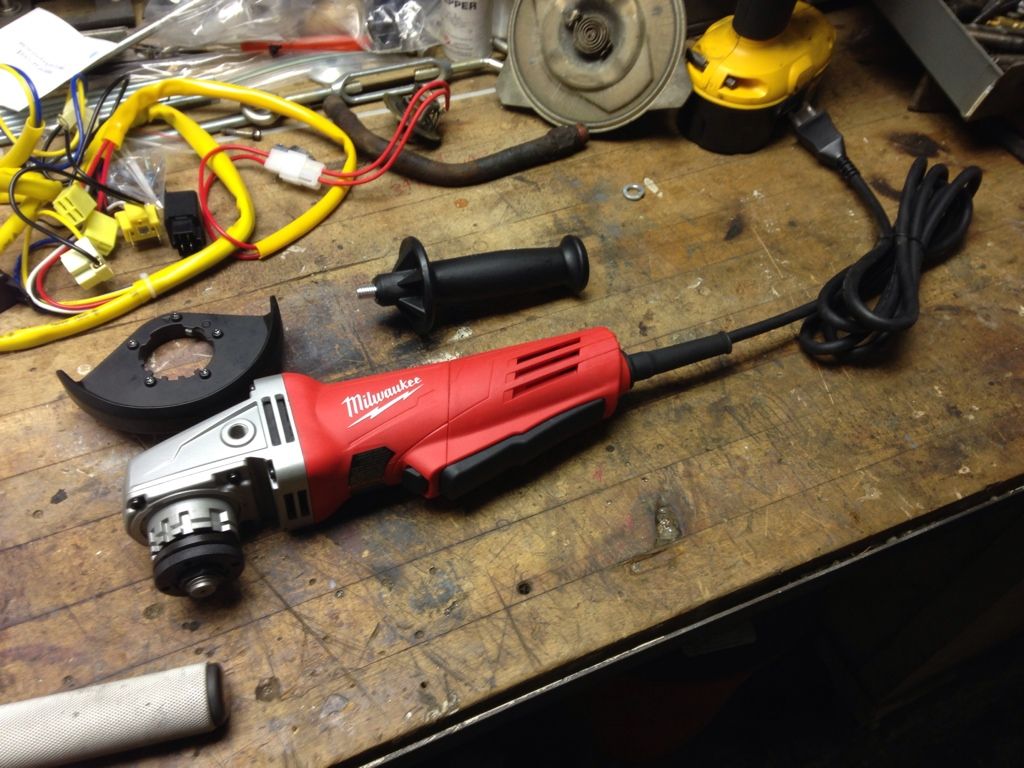
                  I also got a brand new Milwaukee 4 1/2" angle grinder today. Was pretty psyched about that.


                  Hudson

                  Build Thread - http://www.ausjeepoffroad.com/forum/...d.php?t=121903

                  No Amount Of Money Is Worth Your Sanity.

                  Comment


                  • #69
                    Had my front driveshaft out still because i still didn't get around to fixing the transfer case linkage correctly. (It shifts into 4 part time and 4 full time. No neutral or 4lo).

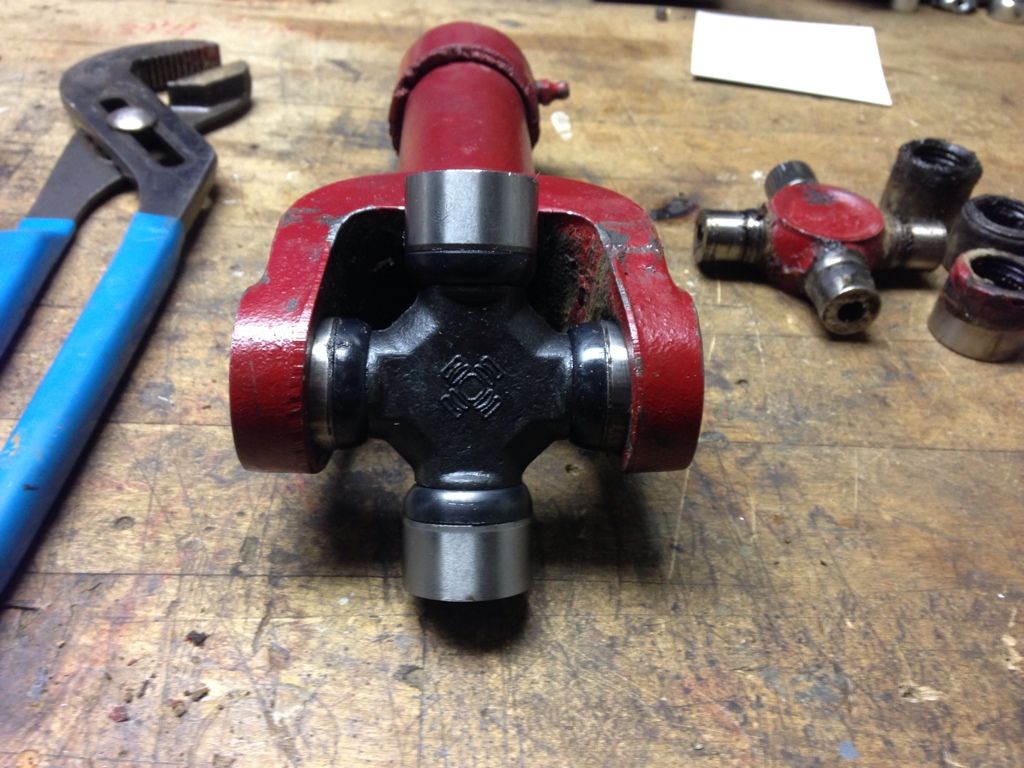
                    Anyways, i went to advance auto and bought a new U-Joint for the front of the driveshaft, and Two new U-Bolts to hold the U-Joint onto the front yoke. U-bolts are much stronger than the stock U-straps, and they're easier to fix if one breaks on the trail.

                    Used the hammer method to press my U-Joint in because i don't have a press. Did that and had it back into the jeep within 30 minutes.

                    Also bought two new battery terminals because mine were getting old and they were kind of junky. Replaced those along with the body ground. That's all good to go.

                    Spent 25$ on a new U-Joint, Two Battery Terminals, And the U-Bolts.

                    Four wheel drive now works perfect for the time being. I can't wait for there to be 20 inches of snow on the road so i can drive through it with the jeep and then proceed to whip my snowmobile down the road. I'm getting excited.

                    The new headlight housings also came in. I installed those with Hella 60/55W H4 bulbs, and the new harness, and oh my god, it's magnificent. I can't believe the different. It's one of the best upgrades i've ever did on the jeep, and well worth the 80$ i spent on it.

                    They work wonders.


                    Hudson

                    Build Thread - http://www.ausjeepoffroad.com/forum/...d.php?t=121903

                    No Amount Of Money Is Worth Your Sanity.

                    Comment


                    • #70
                      Looks like the jeep decided to make a milkshake and not invite me to the action.

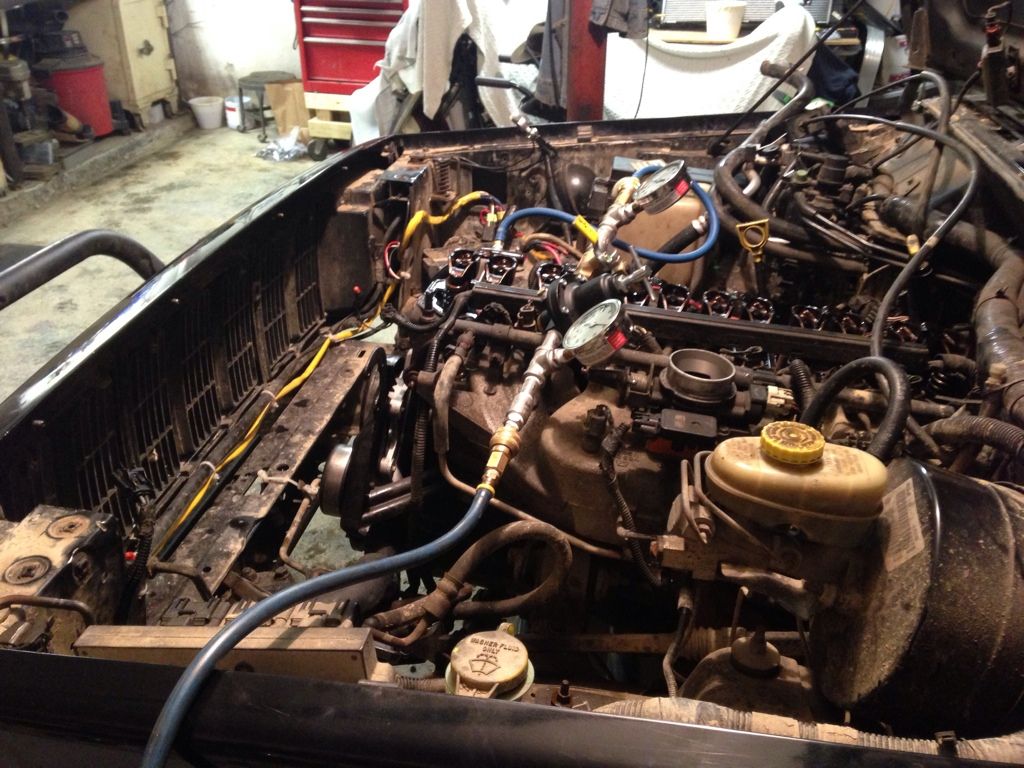
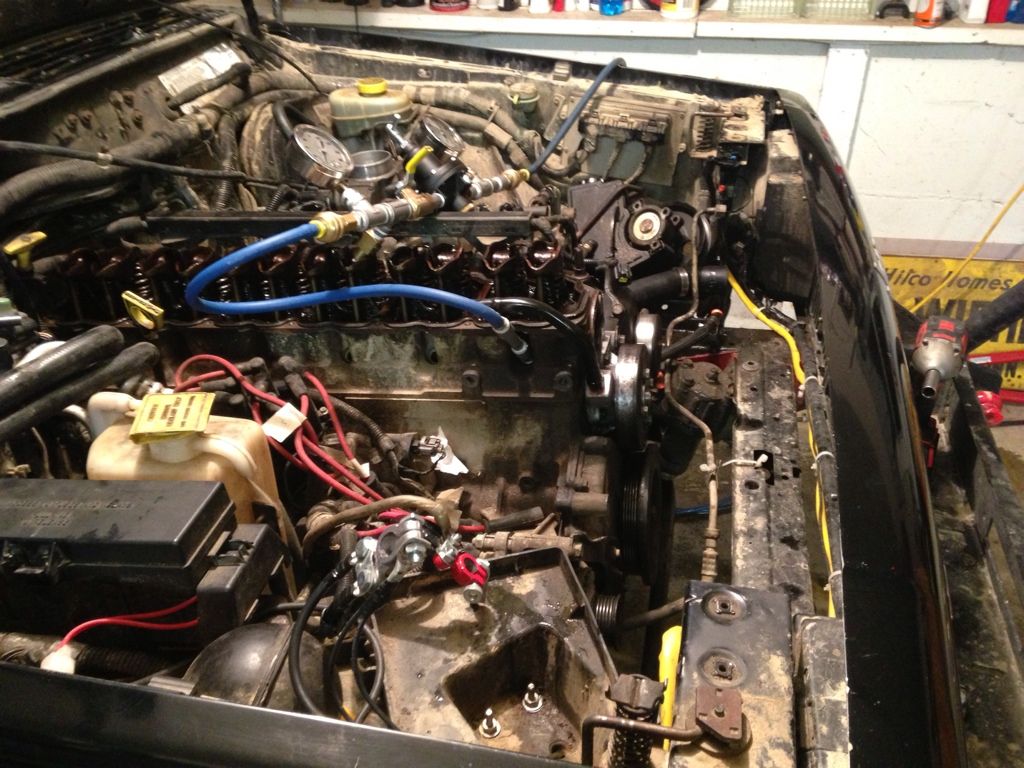
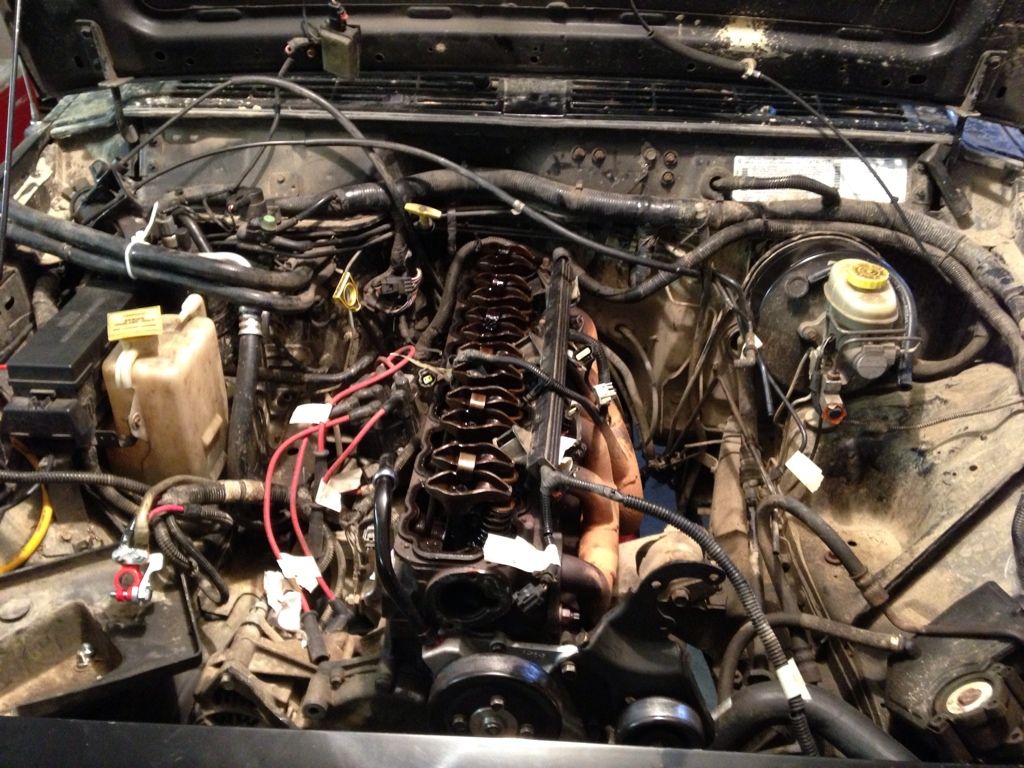
                      This is going to be fun to fix. Got the valve cover off, and i'm going to continue doing a leakdown test to see if i can see/hear air bubbling so i can locate this easier.

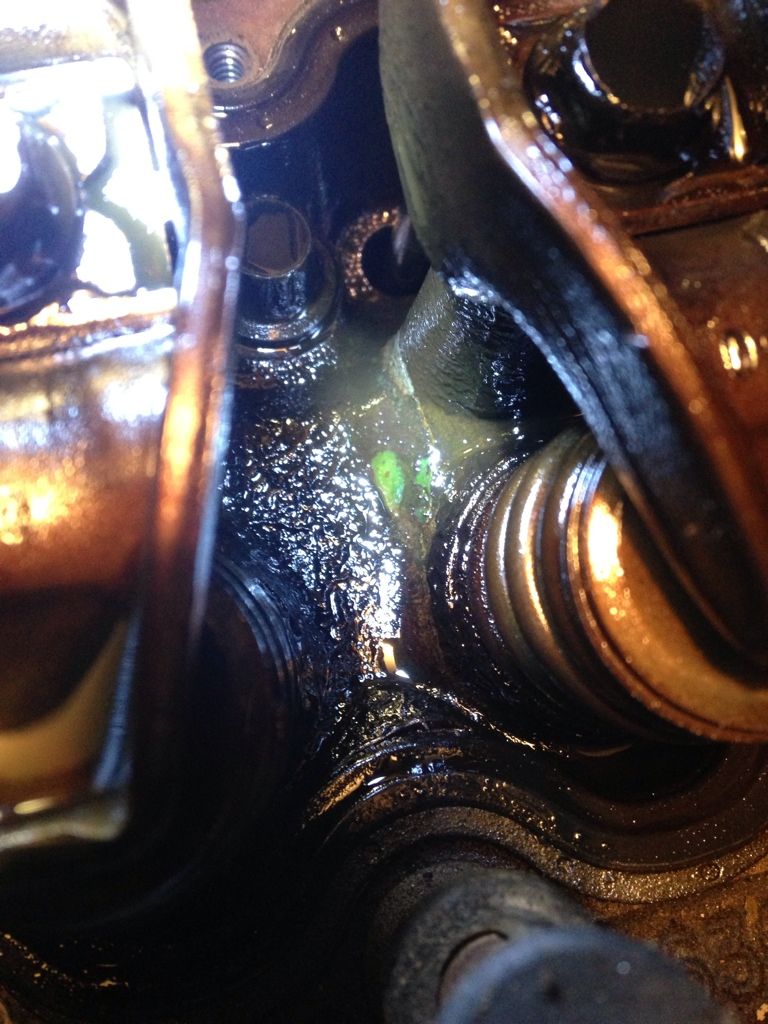
                      I don't see any visible cracks, but the oil does appear to have a tint of green to it. Maybe i'm seeing things.


                      Will read up in a second, currently pulling the jeep apart. In the past hour or so i have removed;

                      -Radiator
                      -Battery
                      -A/C Compressor
                      -A/C Compressor Bracket
                      -Power Steering Pump
                      -Fan Clutch
                      -Thermostat Housing
                      -Air Box (K&N Filter & What Not.)

                      Also pulled some other stuff i'm probably forgetting.

                      Sprayed Kroil (I prefer it over PB Blaster) on all the exhaust manifold bolts because i heard they're a royal pain in the ass to get off. Should loosen em up a little bit.

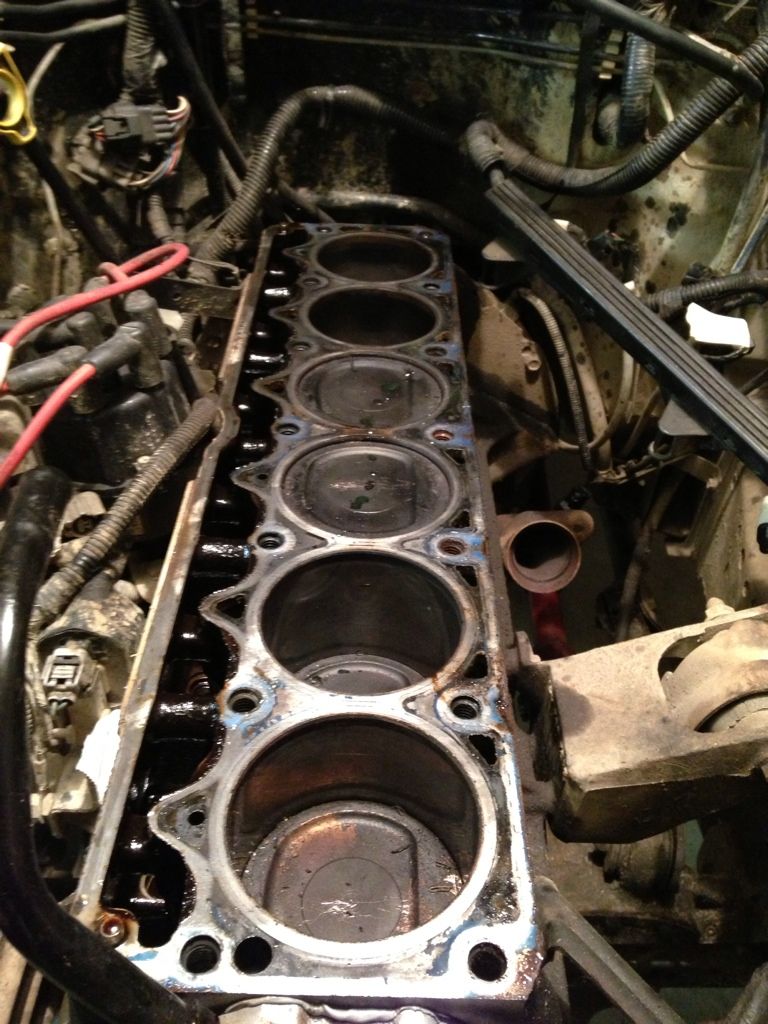
                      I think i have managed to find the crack in the head. Or at least i've taken a picture of something that looks like a crack. I also found out just how nice it is to have air tools. They make everything so fast.

                      Just need to figure out which head to replace mine with and then i'll begin putting it all back together.

                      Contemplating swapping out my steering box at this point to correct the steering wheel once and for all. I mean hell, it's the easiest it's ever going to get to swap that thing out at this stage.

                      Did leak down test on cylinder #1. Put it 40PSI and the gauge dropped down to like 5-10ish PSI. Looked around for hissing air and a lot of it is coming out of the intake and some is even blowing out the #3 spark plug hole.

                      I think I might have bad valves on top of whatever else I might have wrong. This engine might be on its last leg. Going to do the rest of the cylinders tomorrow, and then pull the head.


                      Hudson

                      Build Thread - http://www.ausjeepoffroad.com/forum/...d.php?t=121903

                      No Amount Of Money Is Worth Your Sanity.

                      Comment


                      • #71
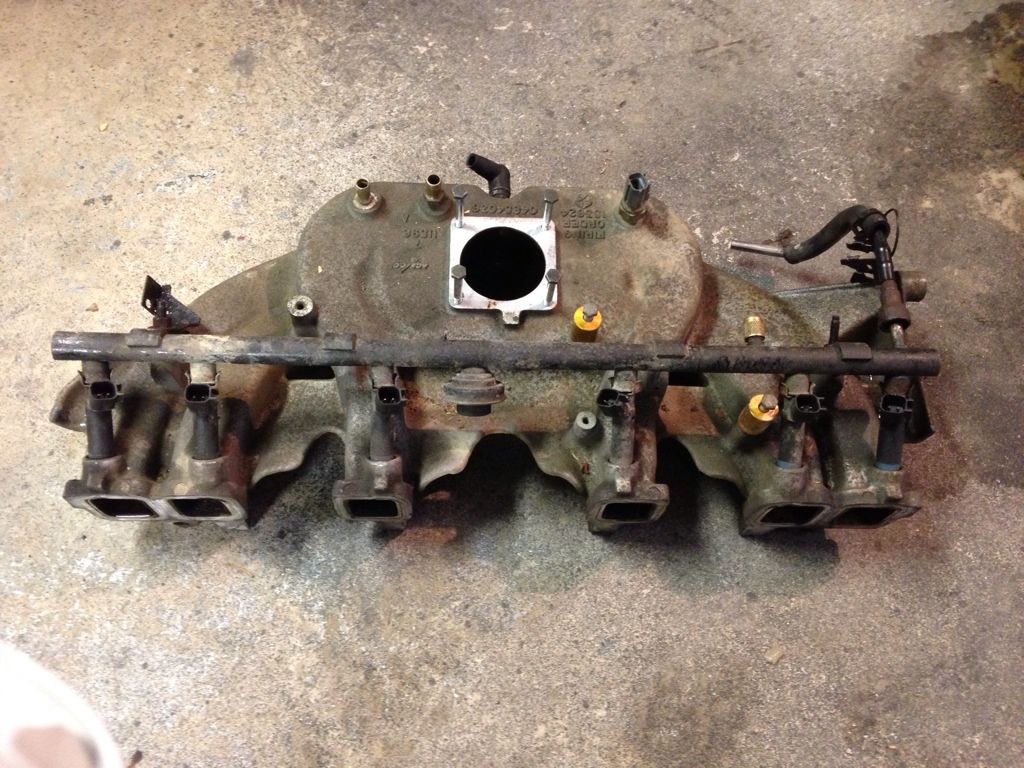
                        Soaking the intake and manifold bolts in Kroil for the past three days has defiantly paid off. Just removed the intake, and my god, those bolts came out so easy. No effort or anything. My air ratchet which is rated for like 40 ft/ibs took them off without a problem after i broke the initial tightness with a ratchet.

                        Those fuel disconnects NEVER ever work. Bough the "special" tool and everything. The one of the radiator, and the one on the fuel line didn't work at all. I even sprayed that thing for days with Kroil but to no avail.

                        Ended up cutting the fuel line in half with a mini tubing cutter. It's a 5/16" line, so i'm going to get a 5/16" flare coupling and flare the thing back together. Way easier than fiddling with those stupid quick disconnects.

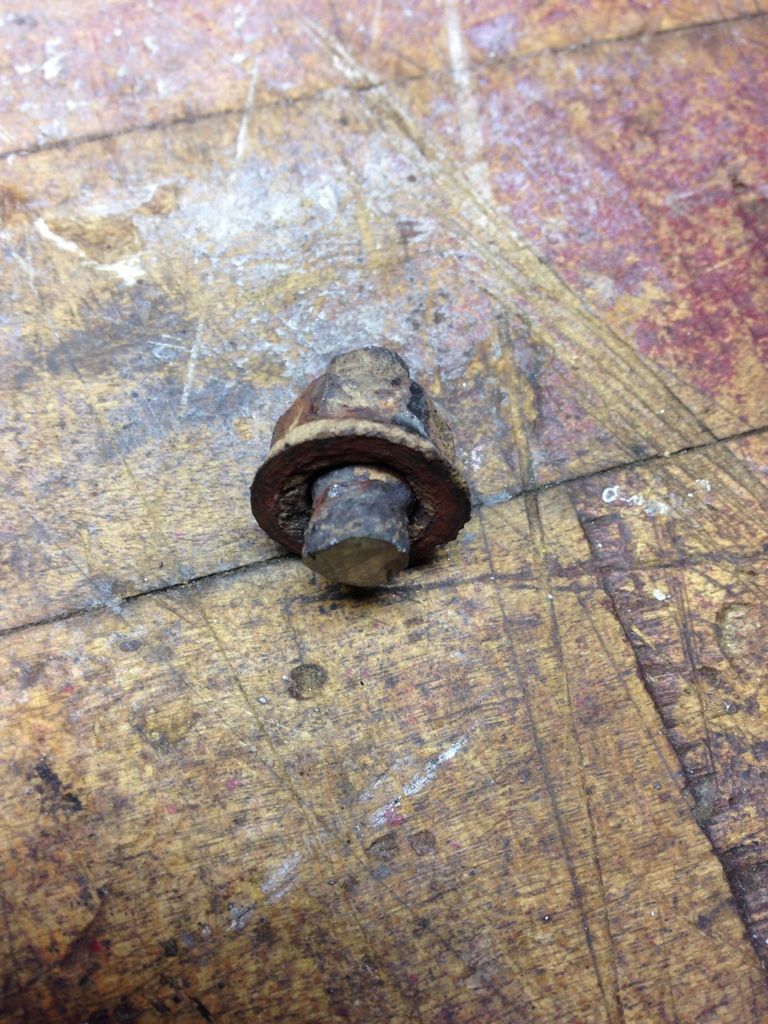
                        The bolts that connect the exhaust manifold to the rest of the exhaust were SO tight. Heated them up a rosebud torch (acetylene + oxygen) for a good 5 minutes, thing was cheery red, and my impact wouldn't even touch them.

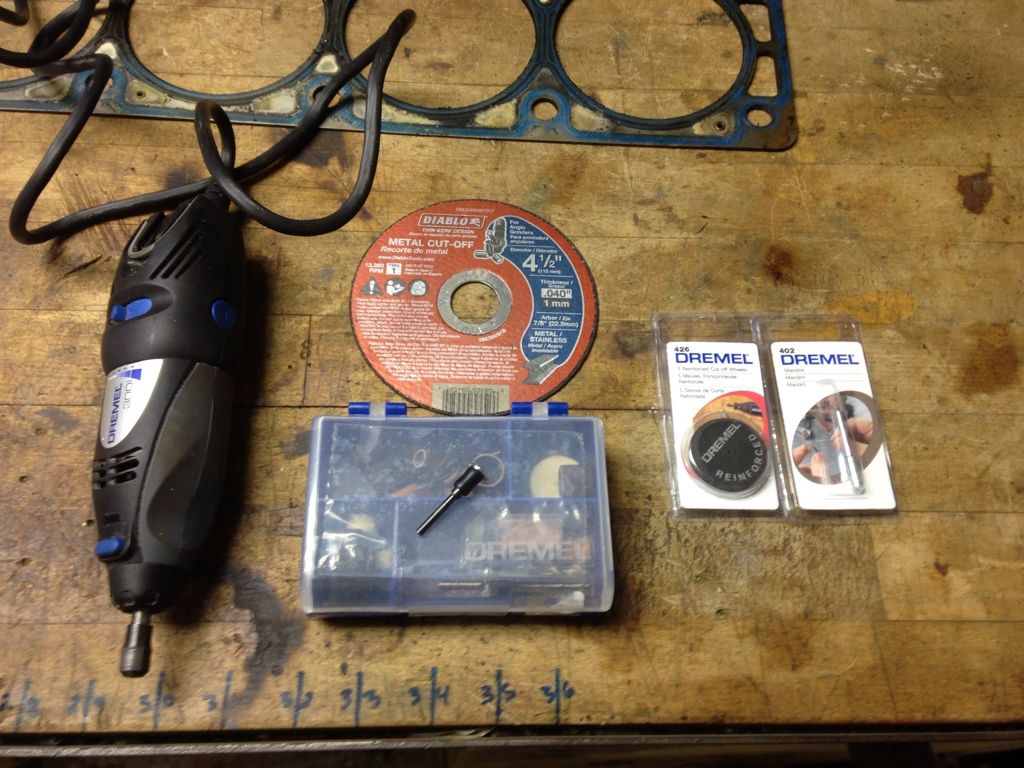
                        I let it cool off, pulled out my angle grinder with a cutoff wheel and just cut the bolts in half. Took all of a minute and they were done. Just need to unbolt the exhaust manifold, take the ground off the back of the engine, and some other slight work, and i will be able to pull the head.

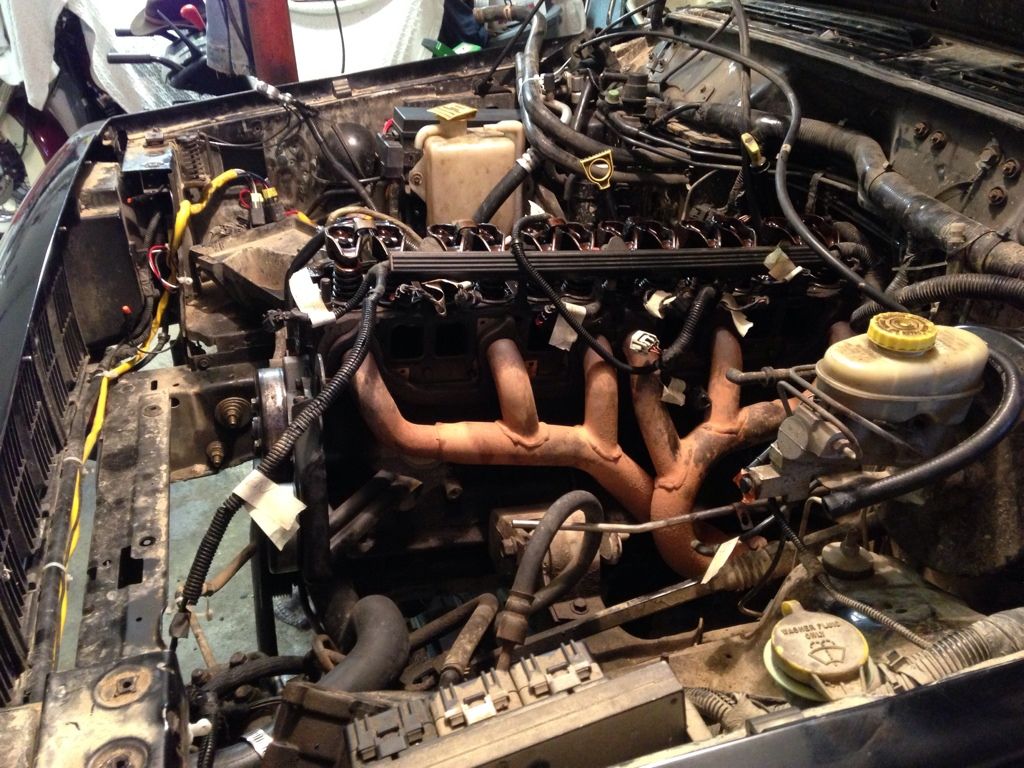
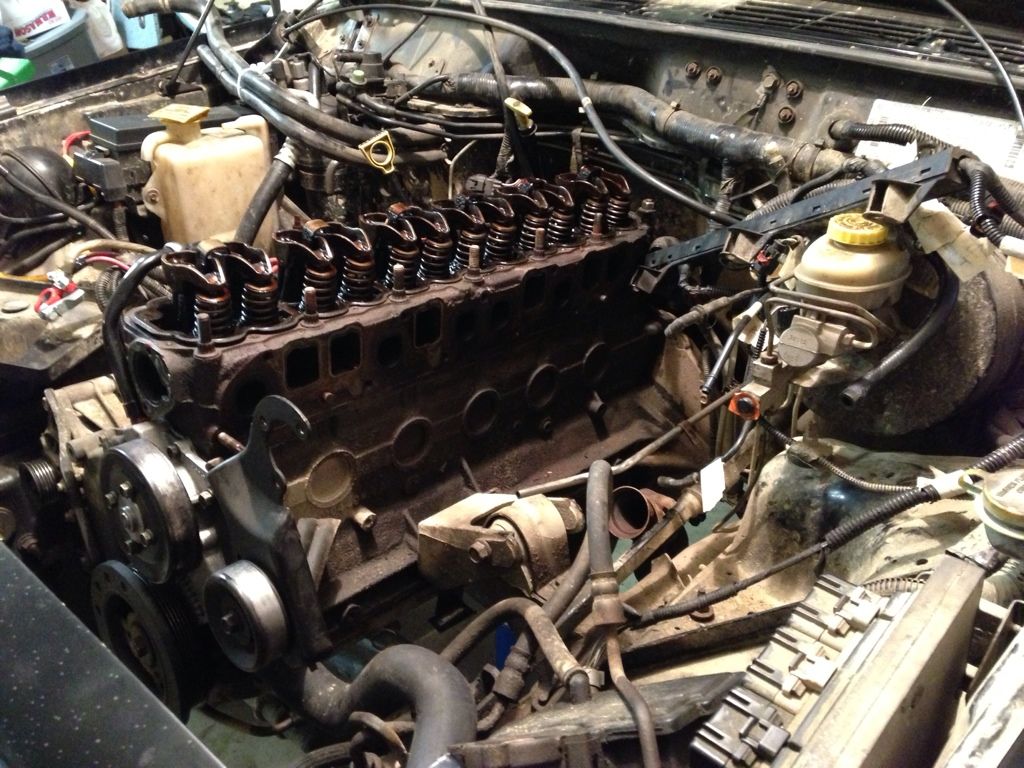
                        I'll have the head off tonight, and will have pictures up. Here's what the jeep currently looks like. My dad is in awe that the internet has actually taught me something useful.

                        Instead of making another post, i'll just add on to this.

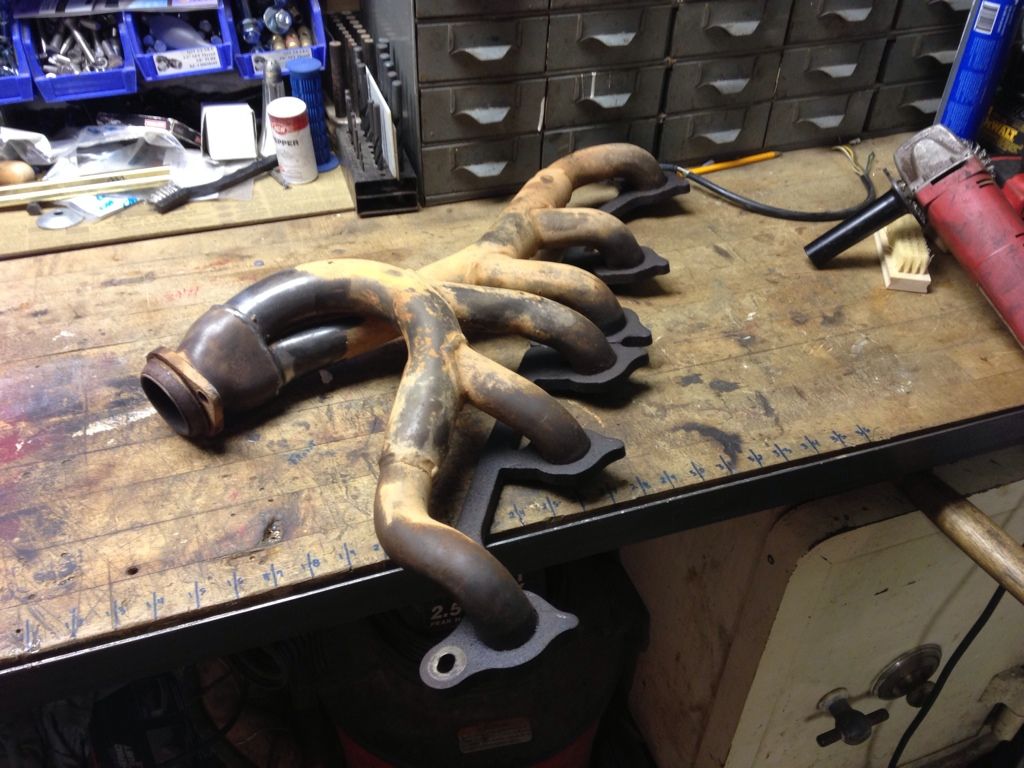
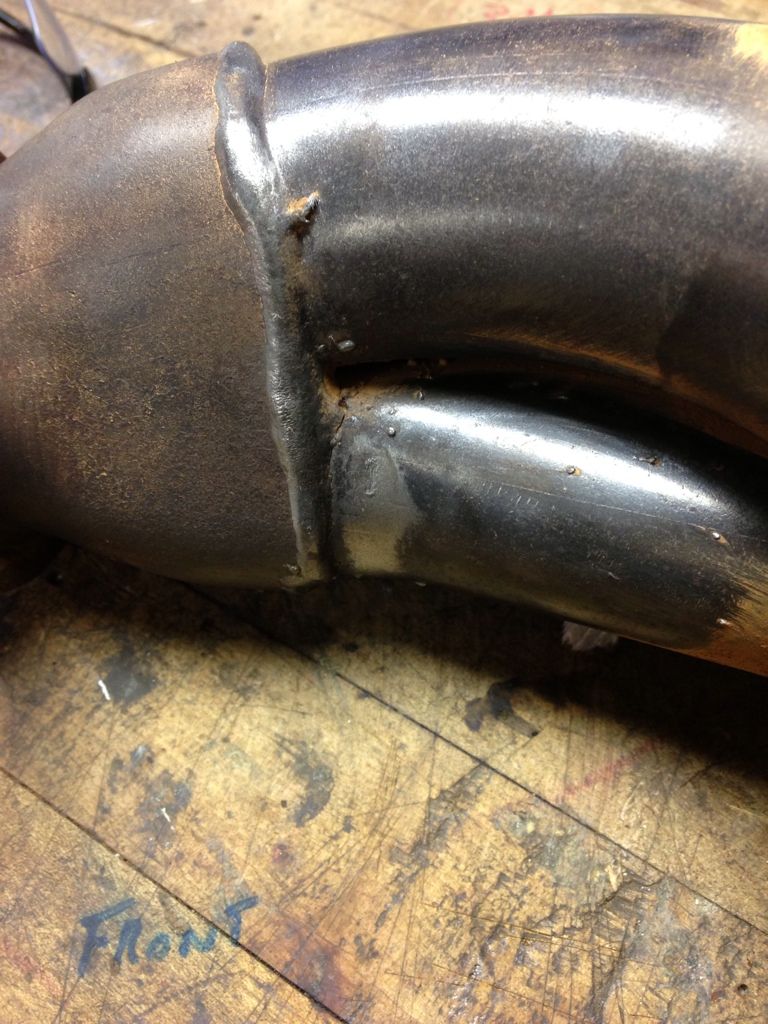
                        Exhaust manifold is off, and there is a slight crack forming in it just like all the rest of the 4.0s. Maybe that is where my MPGs went. Hopefully when i'm done with this, my MPGs will go way back up. No way is my cheap ass buying a new manifold. I'm just going to weld that sucker right back up.

                        Working on pulling the lifters, rods, etc etc and then i'm going to pull the head and send it to a machine shop to be tested.


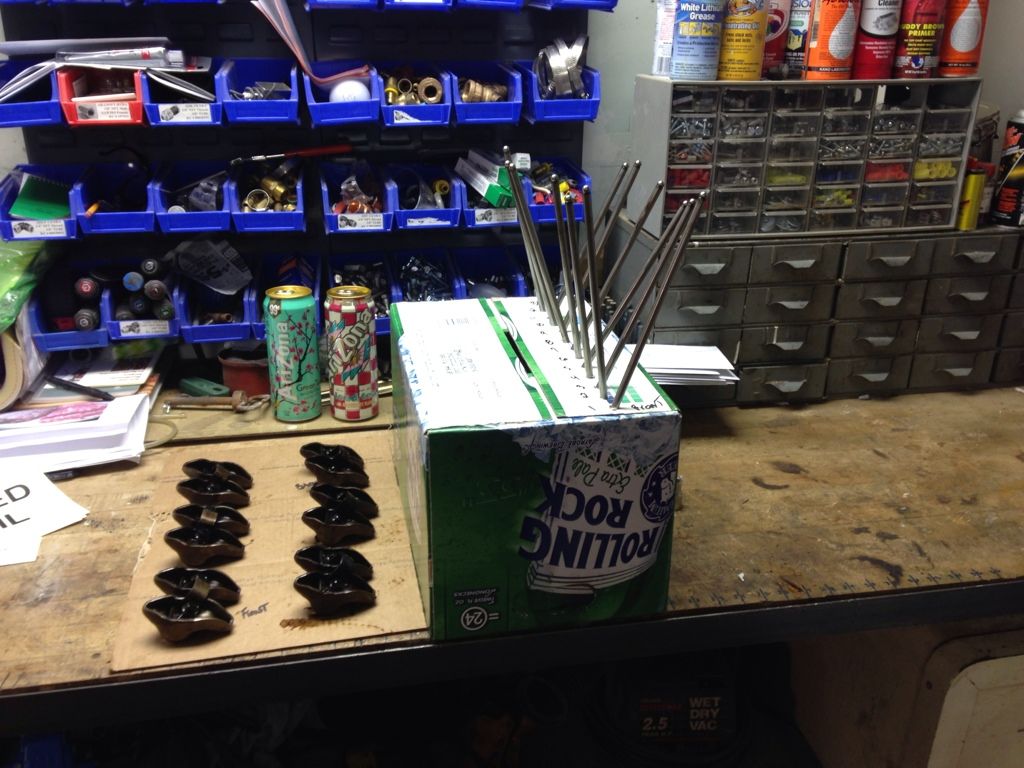
                        Just pulled the rockers and push rods out and got them all nice and labeled so i can install them back in a breeze. Would you even bother cleaning the oil/slight sludge off the rockers, or just leave it how it is?

                        Didn't have a 12 point 13mm or 1/2" socket, so i had to wait until today. Had my dad bring one home from work. Going to get that head pulled off tonight, and we will see just what the problem is.

                        I think i have leaky intake valves as well, but that is to be diagnosed later.


                        Hudson

                        Build Thread - http://www.ausjeepoffroad.com/forum/...d.php?t=121903

                        No Amount Of Money Is Worth Your Sanity.

                        Comment


                        • #72
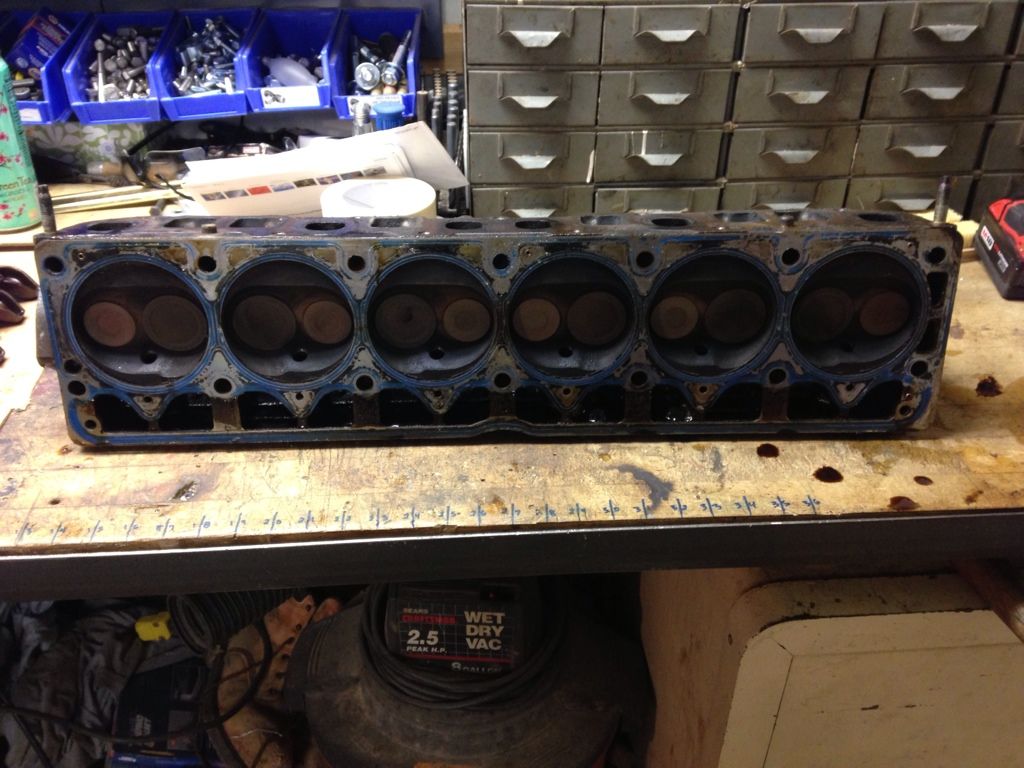
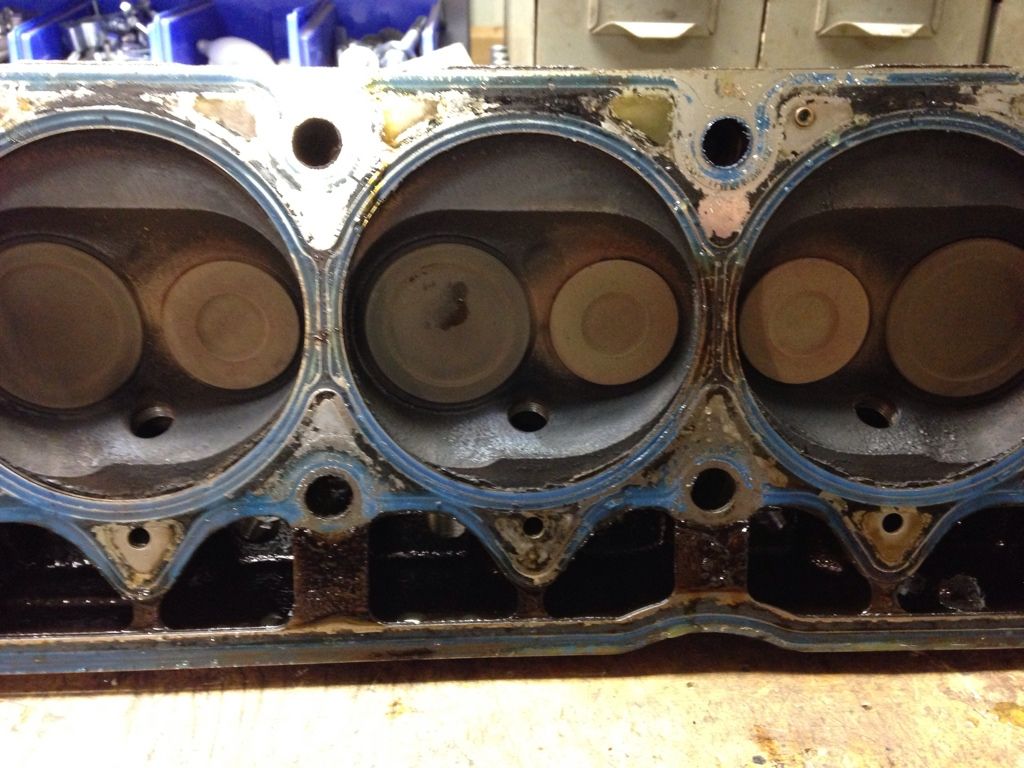
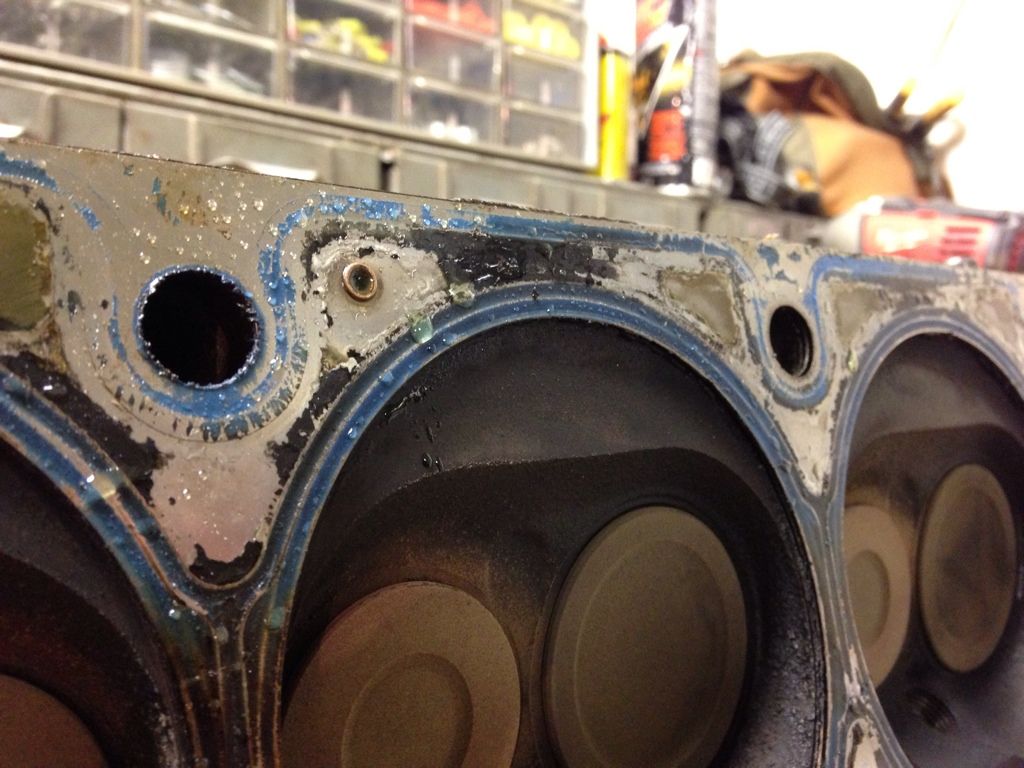
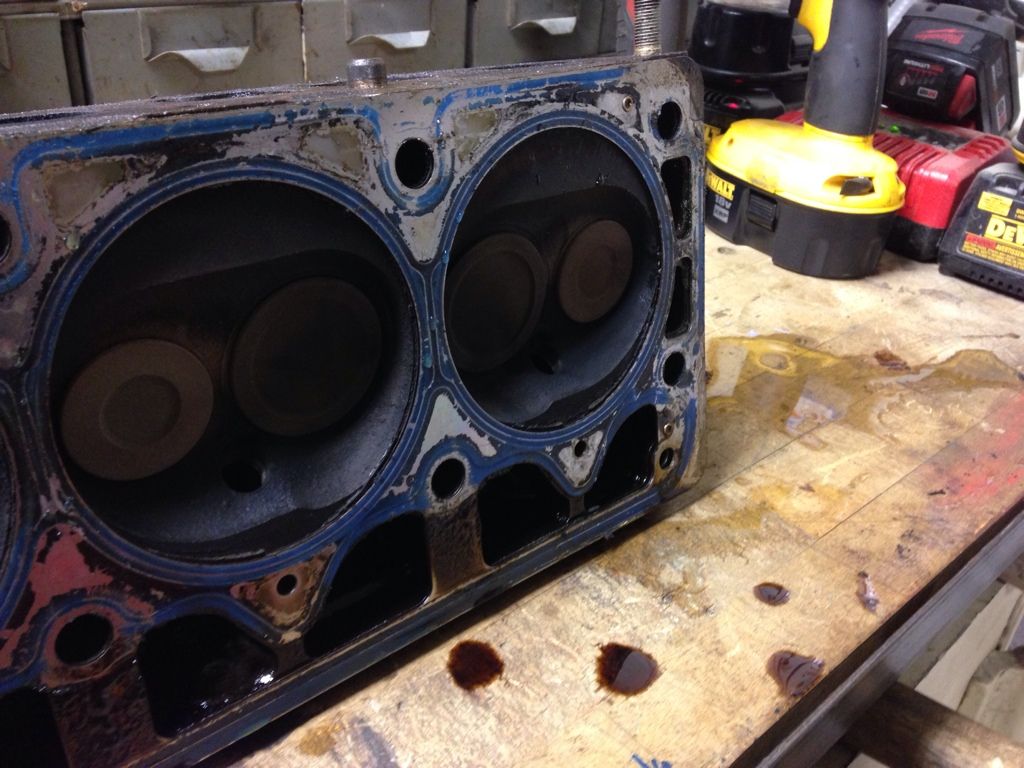
                          Pulled the head off.

                          Head gasket looks fine. At least from what i can tell. I don't see any huge parts of it missing.

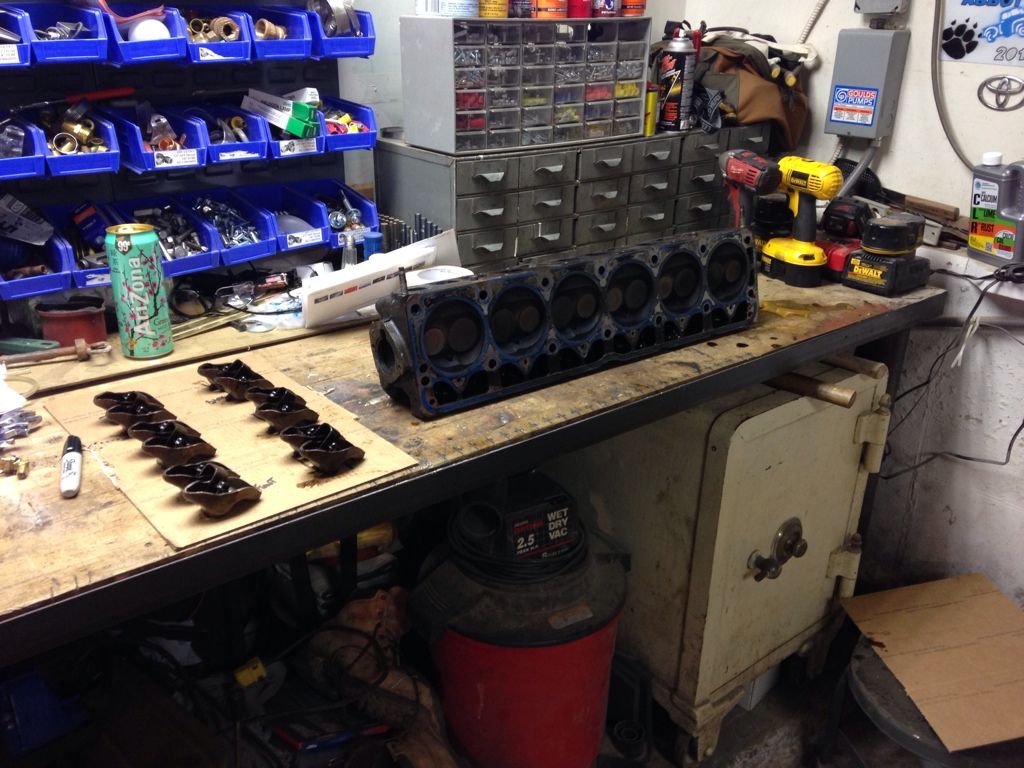
                          I'm assuming it's normal for coolant to be in the lower end of the engine. I set it on my bench, and am going to degrease it to hell and back looking for cracks.

                          If i don't see any cracks, and my headgakset looks fine, i'm going to be super confused as to how all that milkshake stuff got on my valve cover and even more confused on where all my coolant is going.

                          Just went back out there and spun my crankshaft some more. The 3rd and 4th cylinders literally go together in pattern. They would fire at the same time. Is this normal? I don't know. I made a video of it, and it's uploading to youtube now. You can see in the first picture that they're both at the top, and then when i crank the shaft, they both go down at the same speed, come back up at the same time, etc etc. All the others go at different speeds.

                          I'd assume if this wasn't normal i'd have more of a problem than unexplained coolant loss, but i can't be sure.


                          I took the head to a machine shop today to be checked for cracks. Will post the results when they come back. I didn't see any cracks, but then again, my eyes don't work as good as a pressure test.

                          Pulled the headgasket off, and i was looking at both sides of it. I didn't look too good at it yet, but i didn't see anything serious. I will be sure to go look closely between cylinders 3&4 and 4&5.

                          Have to go do some other shenanigans tonight, and as much as i'd love to fiddle around with the jeep, i can't do so.

                          I will report back here will my findings as soon as i find them. Will probably post some close ups of the cylinders you're questioning as well so you guys can look at them.

                          Can anyone think of anything i can do to the jeep to upgrade it while all this is apart in terms of things in the engine compartment?

                          I'm thinking about swapping out my steering box (it's shot) and easy to work on, and i'm thinking about upgrading all the wires that go from the battery to the starter, to the alternator, etc etc. I think that will be worth it, and will pay off in the long run.

                          Any other ideas like this?
                          Hudson

                          Build Thread - http://www.ausjeepoffroad.com/forum/...d.php?t=121903

                          No Amount Of Money Is Worth Your Sanity.

                          Comment


                          • #73
                            Lots and lots of updates inbound heads up.
                            Hudson

                            Build Thread - http://www.ausjeepoffroad.com/forum/...d.php?t=121903

                            No Amount Of Money Is Worth Your Sanity.

                            Comment


                            • #74
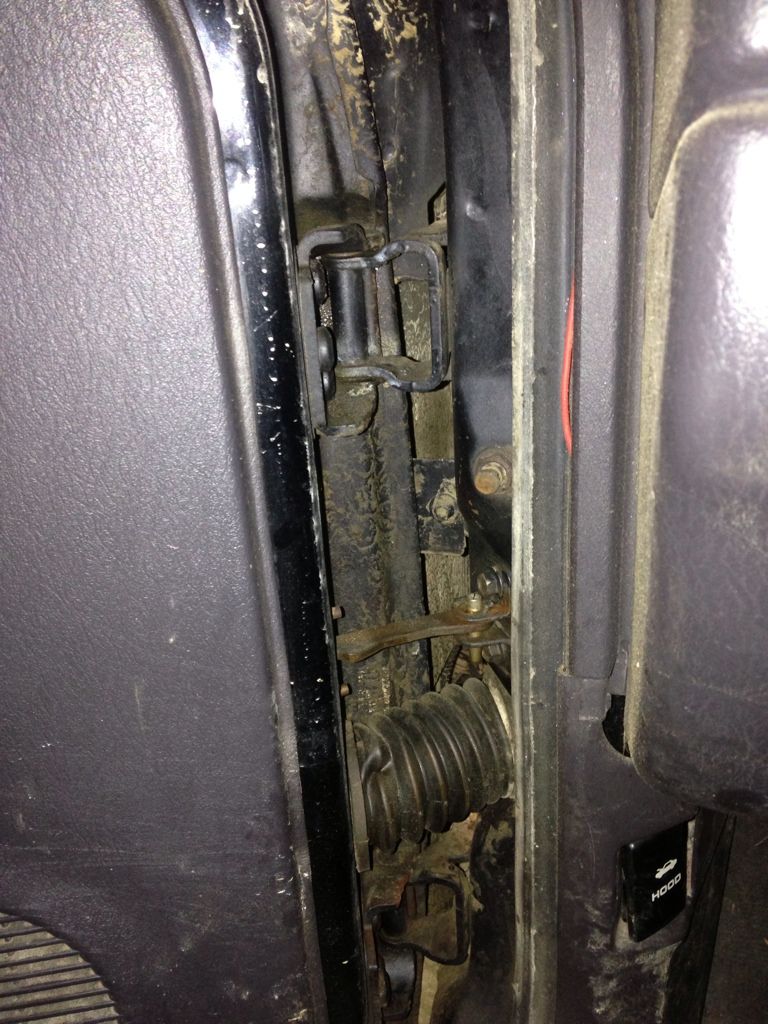
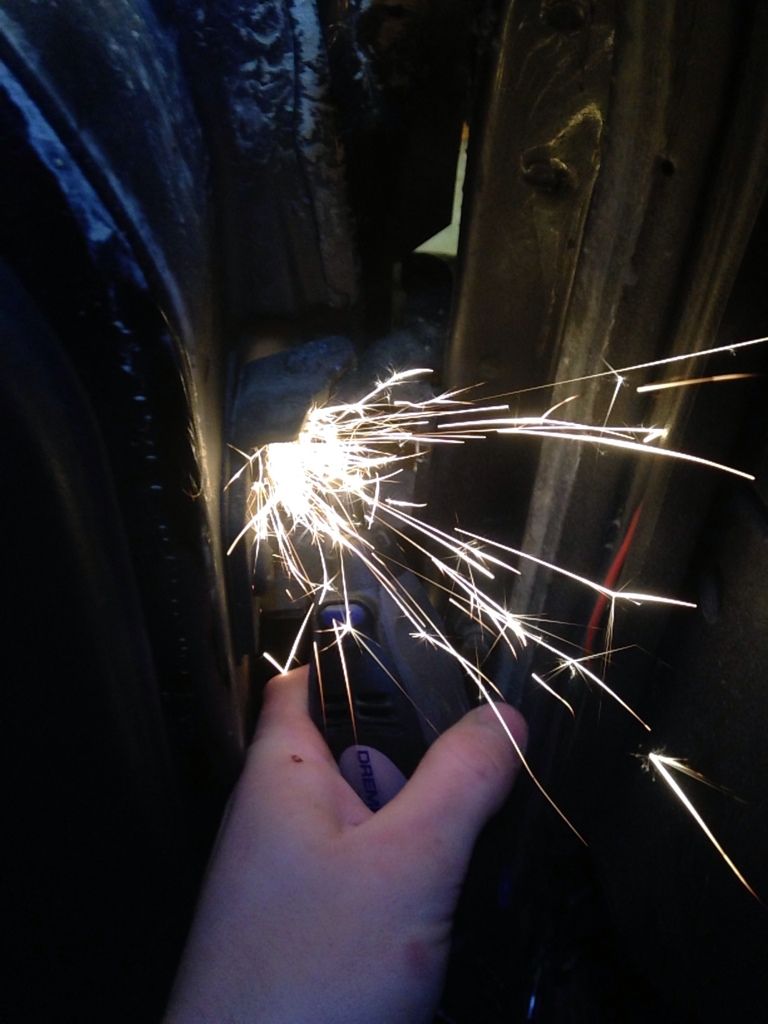
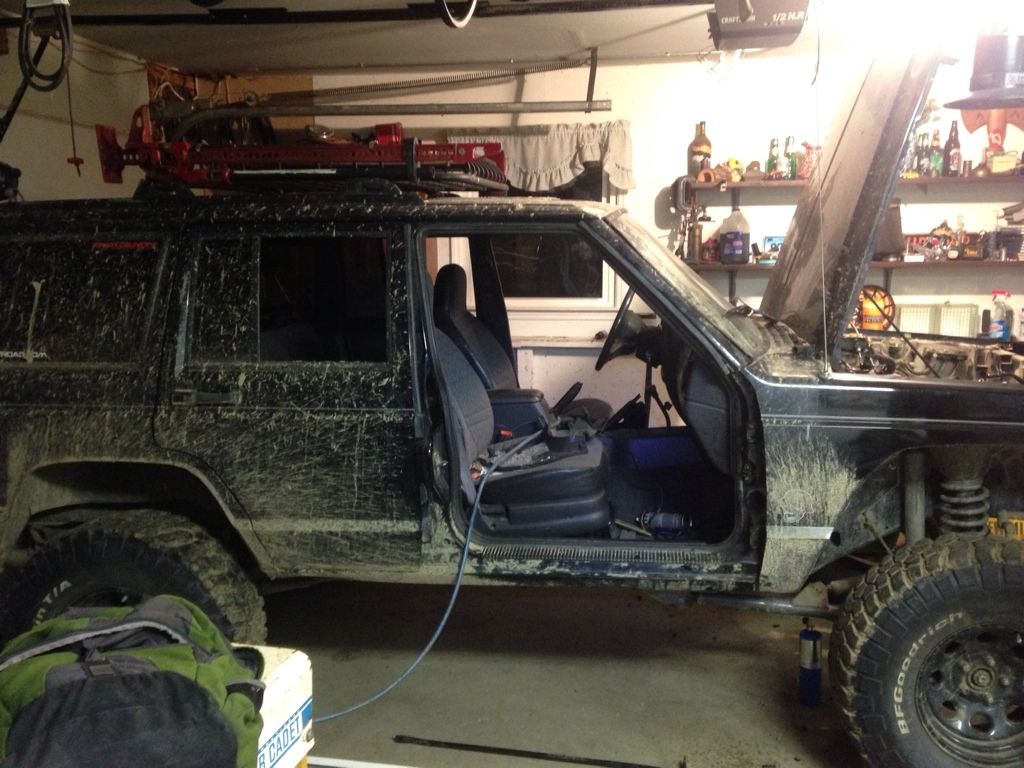
                              Removed the front doors. Now working on the backs.

                              Machine shop called and said my 0630 head is cracked. Ordering a new one momentarily.


                              Hudson

                              Build Thread - http://www.ausjeepoffroad.com/forum/...d.php?t=121903

                              No Amount Of Money Is Worth Your Sanity.

                              Comment


                              • #75
                                Head is bought. Should be here in about a week.

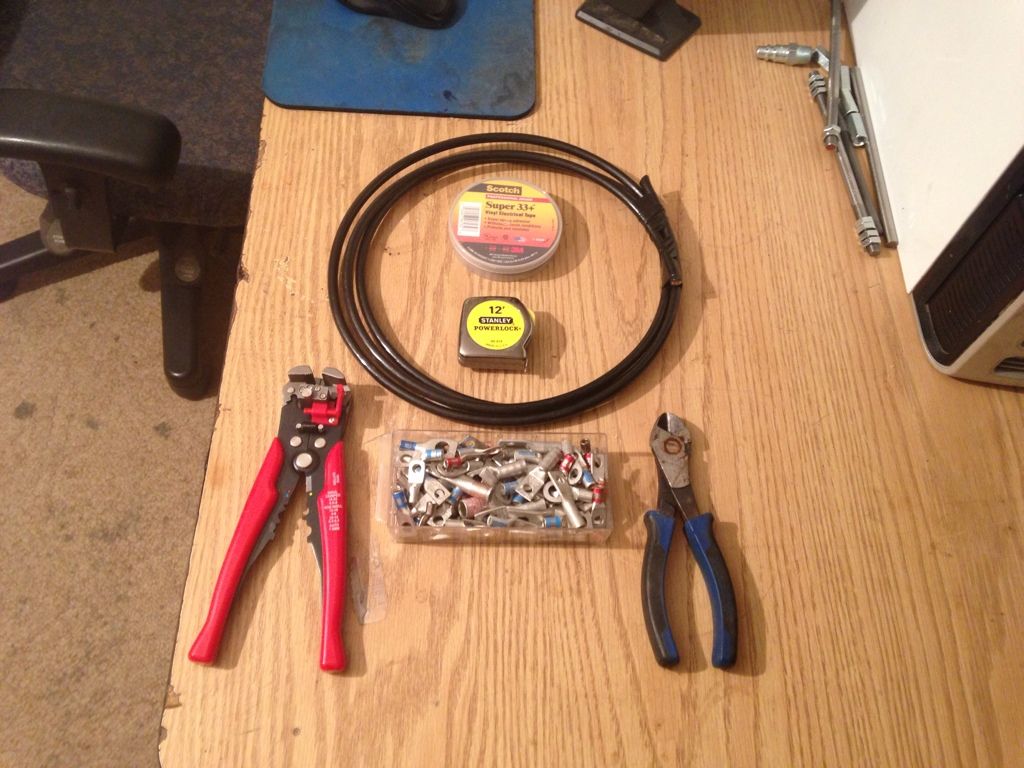
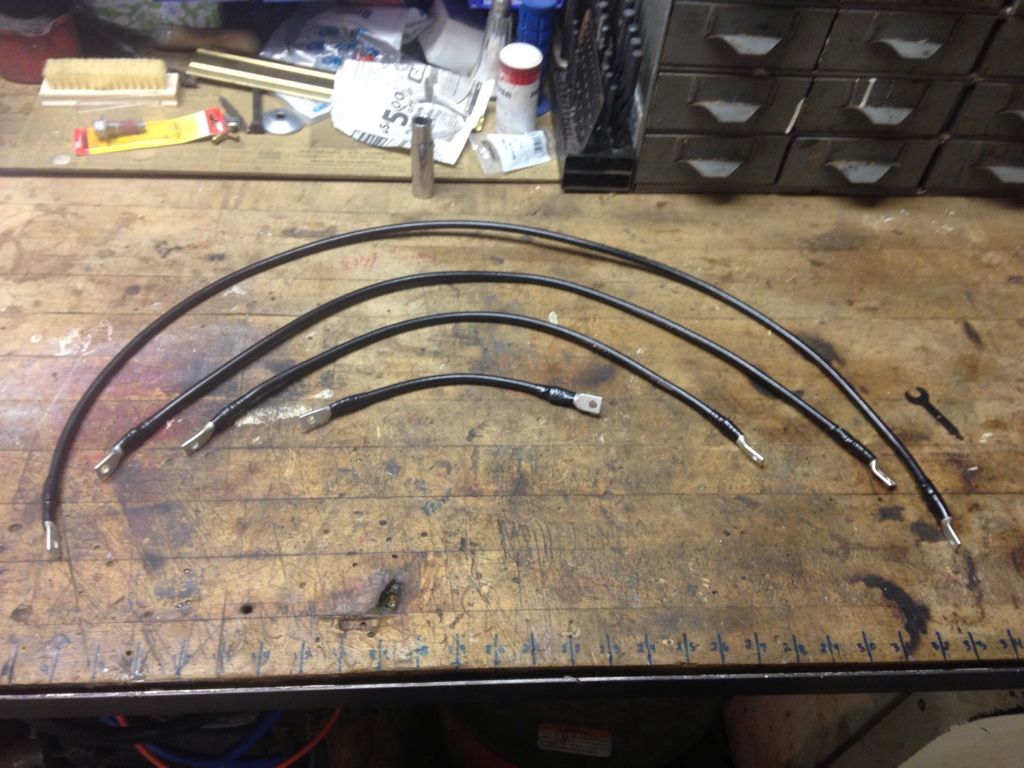
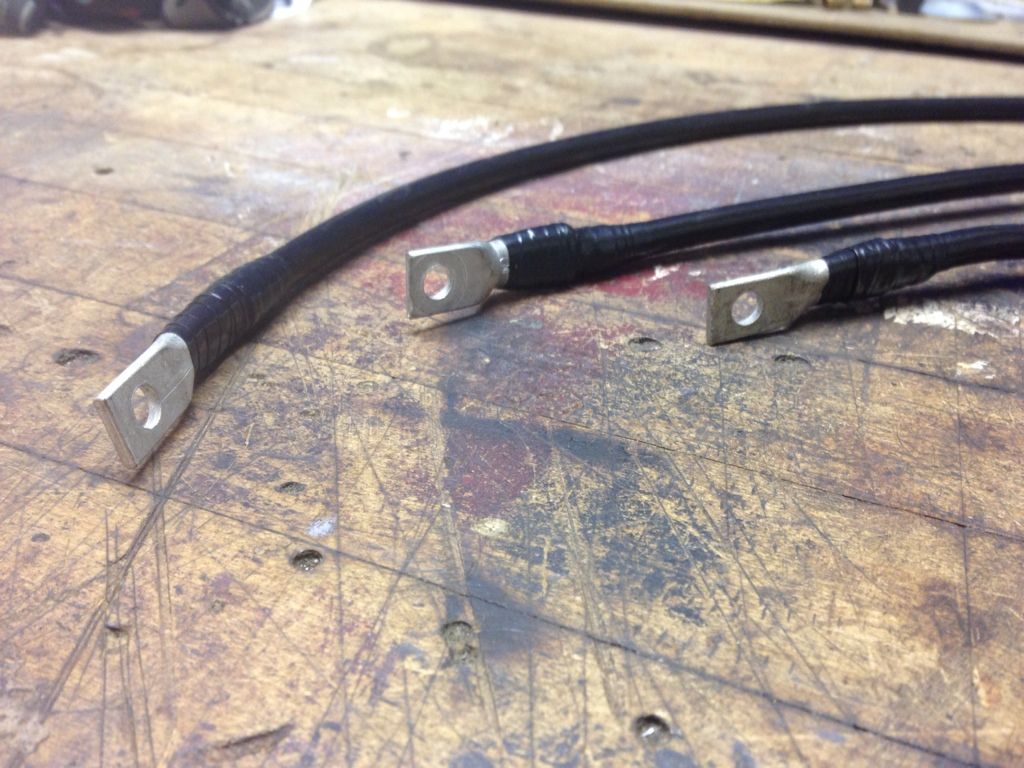
                                Finally got around to making some new charging wires.
                                Used 4AWG Oil & Gasoline Resistant wire.

                                I think they look great, and will defiantly be way better than the stock wires.
                                That 1/2" 12 point deep socket on the bench is waiting anxiously to torque down the head bolts.


                                Hudson

                                Build Thread - http://www.ausjeepoffroad.com/forum/...d.php?t=121903

                                No Amount Of Money Is Worth Your Sanity.
                                Comment

                                Working...
                                X